Înțelegerea cerințelor și standardelor privind chiuvetele pentru camere curate
Când am început să ofer consultanță pentru primul meu proiect privind camerele curate, cu ani în urmă, mi-am dat seama rapid că ceea ce părea un element simplu - o chiuvetă - era de fapt o componentă complexă guvernată de cerințe stricte. Chiuvetele din camerele curate nu sunt doar stații de spălare utilitare; ele sunt puncte de control critice care pot menține sau compromite întregul mediu controlat.
Clasificarea camerelor curate influențează în mod direct specificațiile chiuvetelor și procedurile de instalare. În timp ce mediile ISO clasa 8 ar putea accepta modele mai convenționale, mediile ISO clasa 5 sau 6 necesită materiale și tehnici de instalare specializate. Standardul ISO 14644-1 stabilește concentrațiile maxime admisibile de particule, fiecare număr de clasificare mai mic necesitând o curățenie exponențial mai mare. De exemplu, un mediu ISO clasa 5 permite numai 3 520 de particule (≥0,5μm) pe metru cub, în timp ce ISO clasa 8 permite până la 3 520 000 de particule de aceeași dimensiune.
Considerentele legate de materiale sunt primordiale în mediile camerelor curate. Oțelul inoxidabil domină peisajul pentru un motiv întemeiat - este neporos, ușor de igienizat și extrem de durabil. Cu toate acestea, nu tot oțelul inoxidabil este creat la fel. Calitatea 316L, cu conținutul său suplimentar de molibden, oferă o rezistență superioară la coroziune în comparație cu cea mai comună calitate 304, ceea ce îl face esențial pentru aplicațiile farmaceutice și de semiconductoare în care agenții de curățare agresivi sunt rutinați.
Diferitele industrii au stabilit cerințe de reglementare specifice care au impact asupra instalării chiuvetelor. Instalațiile farmaceutice care respectă orientările GMP ale UE sau USP <797> necesită tranziții fără întreruperi între suprafețe, în timp ce instalațiile de semiconductori acordă prioritate aspectelor legate de descărcarea electrostatică (ESD). Aplicațiile biotehnologice pot necesita protecții suplimentare împotriva contaminării biologice.
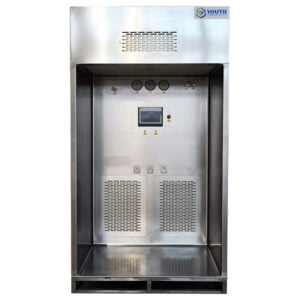
The YOUTH Tech sunt proiectate special pentru a răspunde acestor cerințe variate în toate industriile. Colțurile lor curbate elimină unghiurile de 90° în care se pot acumula contaminanți, în timp ce cusăturile sudate cu precizie minimizează generarea de particule. Aceste caracteristici de design nu sunt doar estetice - sunt elemente critice de conformitate.
Atunci când evaluați cerințele privind chiuveta pentru aplicația dvs. specifică, luați în considerare nu numai nevoile imediate, ci și adaptabilitatea viitoare. O chiuvetă care îndeplinește cerințele actuale ale clasei ISO 7 s-ar putea dovedi inadecvată în cazul în care cerințele de producție necesită ulterior reclasificarea la clasa ISO 6. Această abordare prospectivă a salvat mai mulți dintre clienții mei de costuri semnificative de renovare atunci când operațiunile lor s-au extins.
Planificarea și pregătirea preinstalării
A nu planifica înseamnă a planifica eșecul - nicăieri acest adagiu nu este mai aplicabil decât în cazul instalării chiuvetelor pentru camere curate. Experiența mea de lucru cu o companie farmaceutică majoră a arătat cum planificarea adecvată a prevenit modificări costisitoare ulterioare. Proiectele lor inițiale au trecut cu vederea punctele critice de acces la utilități, ceea ce ar fi necesitat ruperea izolării dacă nu am fi descoperit acest lucru în timpul revizuirii preinstalării.
Începeți cu o evaluare completă a amplasamentului și cu măsurători precise. Dimensiunile standard nu sunt suficiente; va trebui să vă documentați:
- Suprafața disponibilă și suprafața pereților
- Amplasarea racordurilor existente la utilități
- Tipul de construcție a peretelui și capacitatea portantă
- Poziționarea și înclinarea scurgerii de podea
- Cerințe privind spațiul liber pentru operatori și proceduri de curățare
Conexiunile utilităților necesită o coordonare atentă între sistemele mecanice, sanitare și electrice. Conductele de alimentare cu apă trebuie să asigure o presiune corespunzătoare (de obicei 40-60 psi) și necesită adesea sisteme de filtrare suplimentare. Sistemele de scurgere au nevoie de pante adecvate (minim ¼" pe picior) și trebuie să încorporeze mecanisme de captare adecvate pentru a preveni contaminarea prin refulare. În unele medii de camere curate, în special cele care manipulează materiale periculoase, pot fi necesare sisteme specializate de tratare a deșeurilor înainte ca drenajul să poată intra în sistemul general de deșeuri.
Înainte de a începe instalarea, asamblați un set complet de instrumente, inclusiv:
| Instrumente esențiale | Materiale necesare | Echipament de siguranță |
|---|---|---|
| Nivel (minim 24″) | Șuruburi și ancore din oțel inoxidabil | Mănuși din nitril |
| Kit fierăstrău pentru găuri cu biți din carbură | Silicon de etanșare pentru camere curate | Ochelari de protecție |
| Cheie dinamometrică | Bandă PTFE pentru conexiuni | Mască antiparticule |
| Cleme fără marcare | Epoxidică aprobată pentru camere curate | Îmbrăcăminte pentru camere curate |
| Dispozitiv de măsurare cu laser | Material garnitură (dacă se specifică) | Trusă de prim ajutor |
| Cheie specializată pentru bazin | Materiale de documentare | Kit de reținere a scurgerilor |
Considerațiile de siguranță se extind dincolo de protecția personală și includ controlul contaminării. Stabiliți un protocol adecvat de transfer al materialelor pentru a minimiza introducerea particulelor în timpul instalării. Aceasta include de obicei:
- Staționarea materialelor într-o zonă de tranziție
- Ștergerea tuturor uneltelor și componentelor cu alcool izopropilic aprobat pentru camere curate
- Utilizarea covorașelor lipicioase la punctele de intrare
- Menținerea presiunii diferențiale pozitive în timpul instalării
Atunci când vă planificați programul de instalare, prevedeți timp suficient pentru întărirea și degajarea de gaze a etanșanților și adezivilor. Mulți etanșanți pentru camere curate necesită 24-72 de ore pentru întărire completă înainte ca zona să poată fi validată pentru utilizare. Aceasta nu este doar o cerință tehnică - am văzut proiecte întârziate cu săptămâni atunci când acest timp de întărire nu a fost luat în considerare în mod corespunzător în program.
Documentarea condițiilor existente cu fotografii înainte de începerea instalării oferă puncte de referință valoroase și poate proteja împotriva disputelor viitoare. Am adoptat această practică standard după o instalare în care deteriorarea pereților preexistenți a fost atribuită în mod eronat echipei noastre.
Procesul de instalare expert în 7 pași
După numeroase instalări de chiuvete pentru camere curate în unități de producție de semiconductori, produse farmaceutice și dispozitive medicale, am rafinat procesul în șapte pași critici care asigură atât conformitatea cu reglementările, cât și excelența funcțională. Permiteți-mi să vă conduc prin acest proces cu ajutorul cunoștințelor practice pe care le-am dobândit atât din instalațiile de succes, cât și din situațiile dificile de rezolvare a problemelor.
Pasul 1: Pregătirea zonei de instalare
Începeți prin curățarea temeinică a zonei de instalare folosind dezinfectanți și agenți de curățare aprobați pentru camere curate. Îndepărtați tot praful și particulele, lucrând de la tavan la podea cu mișcări de suprapunere. Pentru montarea pe perete chiuvete din oțel inoxidabil pentru camere curate, verificați integritatea și consolidarea pereților. Odată am descoperit un suport structural insuficient în timpul acestei faze a unui proiect - depistarea timpurie ne-a salvat de la o defecțiune catastrofală după instalare.
Marcați poziționarea exactă a chiuvetei cu ajutorul nivelurilor laser pentru a asigura alinierea orizontală și verticală perfectă. Transferați toate punctele de conectare la utilități pe suprafața de montare cu măsurători precise. Pentru unitățile de podea, verificați nivelul podelei cu ±1/16″ pe o distanță de 3 metri.
Pasul 2: Poziționarea și nivelarea chiuvetei
Despachetați cu atenție chiuveta pentru camere curate într-o zonă de așteptare, inspectând-o pentru a depista eventuale deteriorări în timpul transportului. Cel puțin doi tehnicieni trebuie să manipuleze chiuveta pentru a preveni zgârieturile de suprafață sau loviturile. Poziționați chiuveta în conformitate cu referințele marcate, apoi utilizați șublere din oțel inoxidabil, dacă este necesar, pentru a obține o nivelare perfectă.
Pentru chiuvetele montate pe perete, fixați temporar suportul de montare și verificați din nou nivelul înainte de fixarea finală. Unitățile de podea trebuie ajustate cu ajutorul picioarelor de nivelare, cu verificare în mai multe puncte de pe suprafața chiuvetei. Această nivelare meticuloasă nu se referă doar la aspect - drenajul corect depinde de aceasta și am văzut chiuvete nivelate necorespunzător care au provocat probleme legate de apa stătătoare, care au devenit riscuri de contaminare.
Pasul 3: Fixarea chiuvetei la perete/podea
Utilizând feronerie adecvată din oțel inoxidabil, fixați chiuveta pe suprafața de montare. Pentru unitățile montate pe perete, distribuiți sarcina în mod egal în mai multe puncte de montare. Nu utilizați niciodată ancore standard pentru gips-car acestea sunt insuficiente pentru greutate și stresul de utilizare. În schimb, utilizați șuruburi de fixare sau - ideal - montați direct pe elemente structurale. Unitățile de podea trebuie fixate în conformitate cu specificațiile producătorului, care implică, de obicei, metode de fixare cu șuruburi prin orificii preforate ale flanșelor.
La fixarea instalarea chiuvetei pentru camere curate, strângeți toate elementele de fixare la valorile specificate în formă de stea pentru a asigura distribuirea uniformă a presiunii. Strângerea excesivă poate deforma bazinul chiuvetei sau fisura suprafețele de montare, în timp ce strângerea insuficientă permite mișcări care pot compromite conexiunile etanșe.
Pasul 4: Conectarea conductelor de alimentare cu apă
Instalați sisteme de filtrare a apei, dacă acest lucru este cerut de specificațiile camerei dvs. curate. Pentru aplicațiile farmaceutice, aceasta include adesea filtre de 0,2 microni cu grad absolut la punctul de utilizare. Conectați conductele de alimentare folosind fitinguri de compresie adecvate și bandă PTFE aprobată pentru camera curată pe conexiunile filetate. Evitați lipirea țevilor sau etanșările lichide care ar putea introduce contaminare.
Vă recomand să utilizați conducte de alimentare flexibile din oțel inoxidabil împletit cu fitinguri de compresie, mai degrabă decât conexiuni rigide, deoarece acestea suportă mișcări și vibrații minore fără a prezenta scurgeri. Atunci când strângeți conexiunile, utilizați o cheie dinamometrică calibrată în conformitate cu specificațiile producătorului - o strângere de un sfert de tură este adesea insuficientă pentru aplicațiile de înaltă presiune.
Pasul 5: Instalarea sistemelor de drenaj
Conectați scurgerea chiuvetei la sistemul de deșeuri al instalației utilizând materiale adecvate pentru aplicația dvs. Sălile curate farmaceutice necesită de obicei componente de drenaj din oțel inoxidabil sau polipropilenă specializată. Asigurați o pantă adecvată (minim ¼" pe picior) și susțineți liniile de drenaj la intervale corespunzătoare.
Instalați capcanele P la adâncimea corespunzătoare pentru a preveni infiltrarea gazelor de canalizare, menținând în același timp debitele. Unele aplicații necesită capcane specializate cu orificii de eșantionare pentru monitorizarea apelor reziduale. În timpul unei instalații la o fabrică de semiconductori, am încorporat un sistem de neutralizare între chiuvetă și canalizarea clădirii pentru a gestiona deșeurile acide - o cerință trecută cu vederea în planificarea inițială care ar fi putut duce la încălcări ale reglementărilor.
Pasul 6: Etanșarea și chituirea tuturor îmbinărilor
Aplicați etanșant siliconic pentru camere curate la toate îmbinările dintre chiuvetă și suprafețele pereților. Aceasta creează o barieră impermeabilă și etanșă la particule care împiedică contaminarea să intre în cavitatea peretelui sau să iasă din interior. Talonul de etanșare trebuie să fie continuu și uniform, de obicei cu o lățime de ¼" până la ⅜".
Folosiți etanșantul imediat după aplicare pentru a crea un profil bombat care să faciliteze curățarea. Lăsați etanșantul să se întărească în conformitate cu recomandările producătorului înainte de a testa sau de a utiliza chiuveta. Unele silicoane specializate necesită până la 72 de ore pentru întărirea completă și eliminarea gazelor. În această perioadă, mențineți nivelurile adecvate de temperatură și umiditate pentru o întărire optimă - condițiile extreme pot compromite integritatea sigiliului.
Etapa 7: Testarea și verificarea calității
Efectuați un protocol de testare cuprinzător înainte de validarea finală:
- Testați sub presiune toate racordurile de alimentare cu apă (de obicei la 1,5 ori presiunea de lucru timp de 24 de ore)
- Verificați scurgerea corespunzătoare cu ajutorul testelor cronometrate ale sertarului
- Verificați dacă există scurgeri în condiții de funcționare
- Confirmați temperatura și presiunea corespunzătoare a apei la robinet
- Verificarea stabilității chiuvetei sub sarcină
- Documentați toate procedurile și rezultatele testelor
În timpul verificării finale, inspectați toate suprafețele pentru a depista orice contaminare cu particule introdusă în timpul instalării. Curățați temeinic folosind protocoalele aprobate pentru clasificarea camerei dvs. curate. Nu uitați că cerințele de validare variază în funcție de industrie și de aplicație - instalațiile farmaceutice necesită, de obicei, o documentație mai amplă decât instalațiile de producție de dispozitive medicale sau electronice.
Selectarea materialelor pentru instalarea chiuvetelor pentru camere curate
Selectarea materialelor adecvate pentru componentele chiuvetelor pentru camere curate implică echilibrarea mai multor factori, inclusiv generarea de particule, rezistența chimică, durabilitatea și capacitatea de curățare. În timpul unei instalări recente la o unitate de producție de terapie celulară, a trebuit să respingem selecțiile inițiale de materiale care ar fi fost acceptabile în alte medii de camere curate din cauza cerințelor specifice ale procesului.
Clasele de oțel inoxidabil trebuie analizate cu atenție în funcție de cerințele aplicației:
| Oțel inoxidabil Grad | Proprietăți cheie | Cele mai bune aplicații | Limitări |
|---|---|---|---|
| 304/304L | Bună rezistență la coroziune, Rentabil, Formabilitate excelentă | Utilizarea generală în camere curate, medii ISO clasa 7-8, fabricarea dispozitivelor medicale | Rezistență limitată la cloruri, nu este ideal pentru medii chimice agresive |
| 316/316L | Rezistență superioară la coroziune, Rezistent la cloruri, Rezistență sporită la pitting | Producție farmaceutică, aplicații biotehnologice, procesare chimică, medii ISO clasa 5-6 | Cost mai ridicat (20-30% premium față de 304), rezistență la căldură ușor mai scăzută |
| 316Ti | Rezistență excepțională la coroziune, Stabilitate superioară la temperaturi ridicate, Excelent pentru componente sudate | Fabricarea semiconductorilor, Aplicații la temperaturi ridicate, Regimuri de curățare agresive | Cost semnificativ mai ridicat, disponibilitate limitată a componentelor |
| AL-6XN | Rezistență ultra-înaltă la coroziune, superioară 316L în medii cu clorură | Aplicații farmaceutice critice, medii extrem de corozive | Cost foarte ridicat, Cerințe de fabricație specializate |
Finisajul suprafeței oțelului inoxidabil influențează semnificativ atât capacitatea de curățare, cât și generarea de particule. Un finisaj #4 (granulație 180) oferă un bun echilibru între netezime și rentabilitate pentru majoritatea aplicațiilor. Pentru medii mai stricte, finisajele electropolite reduc rugozitatea suprafeței la Ra<0,5μm, minimizând locurile de captare a particulelor. Cu toate acestea, acest lucru implică un cost suplimentar de aproximativ 30-50% față de finisajele standard.
Dincolo de bazinul chiuvetei în sine, luați în considerare cu atenție construcția robinetelor. Robinetele tradiționale din alamă cu placare cu crom pot introduce contaminare prin uzură și, în general, nu sunt adecvate pentru camerele curate de peste clasa ISO 8. În schimb, specificați robinete solide din oțel inoxidabil cu piese mobile minime și mecanisme de funcționare lină. Caracteristicile chiuvete de înaltă performanță pentru camere curate includ robinete special concepute pentru a minimiza generarea de particule în timpul funcționării.
Pentru compușii de etanșare, masticurile standard din silicon emană compuși organici volatili (COV) care pot compromite procesele sensibile. Specificați materiale de etanșare siliconice cu conținut scăzut de COV, pentru camere curate, care se întăresc pentru a forma îmbinări fără particule, rezistente chimic. Aceste etanșări specializate costă de obicei de 3-4 ori mai mult decât silicoanele standard pentru construcții, dar sunt esențiale pentru menținerea integrității camerelor curate.
La modernizarea instalațiilor existente, trebuie verificată compatibilitatea materialelor cu agenții de curățare. Odată am fost consultant în cadrul unui proiect în care materialele specificate pentru chiuvete erau adecvate din punct de vedere tehnic, dar incompatibile cu protocolul de curățare standardizat al instalației. Degradarea materialelor rezultate ar fi compromis mediul controlat în câteva luni.
Provocări și soluții comune de instalare
Fiecare instalare de chiuvete pentru camere curate prezintă provocări unice. Prin zeci de instalări, am întâlnit și am dezvoltat soluții pentru câteva probleme recurente pe care chiar și antreprenorii cu experiență le-ar putea trece cu vederea.
Constrângeri de spațiu și acces la utilități
Spațiul limitat este o provocare comună, în special în instalațiile renovate care nu au fost proiectate inițial ca camere curate. În timpul unui proiect pentru un producător de dispozitive medicale, ne-am confruntat cu o instalare în colț deosebit de îngustă, unde abordările standard ar fi compromis ergonomia.
Soluție: Am lucrat cu producătorul pentru a crea o configurație personalizată a chiuvetei de colț care să maximizeze spațiul disponibil, menținând în același timp distanțele de acces și fluxul de lucru adecvate. Acest lucru a necesitat măsurători precise pe teren și o coordonare strânsă cu echipa de producție, dar a dus la o soluție optimă care ar fi fost imposibilă cu componentele standard din catalog.
Pentru instalațiile de modernizare în care accesul la perete este limitat, luați în considerare montajul independent chiuvete pentru camere curate cu backsplash-uri integrate care pot fi sigilate la pereții existenți. Această abordare elimină necesitatea demolării extinse a pereților, oferind în același timp o instalare conformă.
Prevenirea contaminării încrucișate
În instalațiile farmaceutice multiprodus, prevenirea contaminării încrucișate între zonele de producție este esențială. Dacă nu sunt proiectate și instalate corespunzător, scurgerile standard pentru chiuvete pot deveni vectori de contaminare.
Soluție: Implementați sisteme de evacuare dedicate pentru fiecare zonă de producție, în loc să le conectați la sistemul de drenaj comun. În cazul în care acest lucru nu este fezabil, instalați dispozitive de prevenire a refluxului și goluri de aer în sistemele de drenaj pentru a preveni migrarea contaminării. În plus, luați în considerare modele de chiuvete cu apărători împotriva stropirii integrate pentru a limita jetul de apă în zona chiuvetei.
Pentru un producător de vaccinuri, am instalat sisteme specializate de drenaj cu două recipiente cu porturi de monitorizare între recipientul primar și cel secundar pentru a detecta orice scurgere înainte ca aceasta să ajungă în zonele comune. Deși acest lucru a adăugat aproximativ 40% la costul sistemului de drenaj, a oferit o protecție esențială pentru loturile lor de producție de mai multe milioane de dolari.
Tranziții de materiale și etanșare
Joncțiunea dintre chiuvetă și suprafețele înconjurătoare creează adesea un punct vulnerabil pentru acumularea contaminării. Metodele standard de etanșare cedează frecvent în timp din cauza expunerii la substanțe chimice de curățare și a solicitărilor mecanice.
Soluție: Specificați backsplash-uri integrate în fabrică, acolo unde este posibil, pentru a elimina îmbinările din câmp. În cazul în care trebuie să existe tranziții, utilizați muluri radiale proiectate special pentru aplicații în camere curate. Acestea creează o suprafață netedă, continuă, care previne acumularea de particule și rezistă la curățarea agresivă.
În timpul unei instalări la o fabrică de semiconductori, am constatat o incompatibilitate între materialul de etanșare siliconic specificat și sistemul de pardoseală epoxidic. După consultarea producătorilor de materiale, am identificat un material de etanșare epoxidic specializat în două părți, care asigura o aderență compatibilă la ambele suprafețe și menținea flexibilitatea în timp, în ciuda variațiilor semnificative de temperatură din zona de procesare.
Calitatea apei și probleme de control
Multe instalații trec cu vederea aspectele legate de calitatea apei până când apar problemele. Presiunea inconsecventă a apei poate cauza stropiri care compromit zonele curate adiacente, în timp ce depunerile minerale din apa nefiltrată creează probleme de curățare și o potențială contaminare.
Soluție: Integrați regulatoare de presiune în conductele de alimentare pentru a menține un debit constant indiferent de fluctuațiile de presiune din instalație. Pentru aplicațiile critice, specificați filtrarea apei la punctul de utilizare cu un nivel corespunzător de microni. În unele cazuri, pot fi necesare sisteme dedicate de purificare a apei pentru a îndeplini specificațiile procesului.
Un start-up biotehnologic cu care am lucrat s-a opus inițial costurilor suplimentare pentru componentele de calitate a apei, dar în cele din urmă a constatat că aceste sisteme se amortizează prin reducerea întreținerii și a riscului de contaminare. Economiile lor inițiale ar fi fost șterse rapid de un singur incident de contaminare care ar fi necesitat oprirea producției și investigații.
Protocoale de întreținere Post-instalare
Longevitatea și performanța chiuvetelor pentru camere curate depind în mare măsură de punerea în aplicare a protocoalelor de întreținere adecvate imediat după instalare. Pe baza experienței mele în gestionarea instalațiilor pentru camere curate, am constatat că stabilirea acestor proceduri înainte de punerea în funcțiune a chiuvetei previne multe probleme comune.
Procedurile zilnice de curățare trebuie să includă:
- Ștergerea tuturor suprafețelor cu dezinfectanți aprobați pentru camere curate
- Inspectarea garniturilor de etanșare și a îmbinărilor pentru depistarea oricăror semne de degradare
- Verificarea debitului de apă și a scurgerii pentru o funcționare corespunzătoare
- Documentarea tuturor activităților de curățenie în jurnalul instalației
Pentru întreținerea săptămânală, implementați inspecții mai amănunțite, inclusiv:
| Componentă | Puncte de inspecție | Probleme potențiale | Acțiuni corective |
|---|---|---|---|
| Ansamblu robinet | Scurgeri în jurul mânerelor, Curgere neregulată a apei, Funcția mânerului | Garnituri uzate, acumulări de minerale, componente slăbite | Înlocuiți garniturile, Detartrați cu agenți autorizați, Strângeți conexiunile la cuplul specificat |
| Ansamblu de scurgere | Debit, Retenție de apă, Mirosuri | Blocaj parțial, defectarea capcanei, deteriorarea garniturii | Curățați sifonul, înlocuiți garniturile, verificați panta corectă |
| Feronerie de montare | Stabilitate, integritatea sigiliului | Slăbirea elementelor de fixare, Etanșare fisurată | Strângeți din nou conform specificațiilor, înlocuiți materialul de etanșare după cum este necesar |
| Suprafața bazinului | Decolorare, zgârieturi, pete de apă | Agenți de curățare necorespunzători, Curățători abrazive | Utilizarea de detergenți adecvați, punerea în aplicare a formării personalului |
Frecvența acestor activități de întreținere ar trebui să crească odată cu intensitatea utilizării și să scadă odată cu clasificarea camerei curate (mai frecvente în ISO 5 decât în ISO 8). Vă recomand să creați un calendar de întreținere detaliat care să se integreze în sistemul general de management al calității al instalației dumneavoastră.
Cerințele privind documentația depășesc simplele jurnale de întreținere. În timpul punerii în funcțiune, stabiliți parametrii de performanță de bază care să servească drept referință pentru evaluările viitoare. Acestea pot include debite de apă, timpi de scurgere și fotografii detaliate ale îmbinărilor și etanșărilor critice. În timpul unei inspecții de reglementare la un client din domeniul farmaceutic, această documentație s-a dovedit neprețuită în demonstrarea conformității continue cu standardele camerelor curate.
Pentru întreținerea preventivă, stabiliți un program trimestrial pentru:
- Testare completă a scurgerilor sub presiune operațională
- Inspectarea tuturor fitingurilor și conexiunilor accesibile
- Verificarea funcționării corespunzătoare a sistemului de drenaj
- Evaluarea stabilității chiuvetei și a integrității montării
- Evaluarea stării suprafeței pentru orice degradare
Atunci când vă stabiliți protocoalele de întreținere, luați în considerare și impactul substanțelor chimice de curățare asupra materialelor chiuvetelor. Mulți dezinfectanți agresivi pot deteriora în timp anumite tipuri de oțel inoxidabil dacă nu sunt spălați corespunzător. O instalație pentru care am oferit consultanță a dezvoltat gropi de suprafață semnificative deoarece SOP-ul specificase dezinfectanți pe bază de clor fără proceduri adecvate de neutralizare.
Studiu de caz din lumea reală: Instalarea chiuvetelor pentru camere curate farmaceutice
Am condus recent o provocare instalare specializată a chiuvetelor pentru camere curate pentru un producător farmaceutic care își modernizează instalația de umplere ISO clasa 6 pentru a susține o nouă linie de produse injectabile. Acest proiect a evidențiat modul în care cunoștințele teoretice se întâlnesc cu aplicarea practică în scenarii din lumea reală.
Instalația s-a confruntat cu mai multe constrângeri care au complicat instalarea:
- Producție 24/7 în zone adiacente care nu puteau fi contaminate
- Un termen scurt de doar 72 de ore pentru instalarea și validarea completă
- Acces limitat la perete din cauza sistemelor de panouri existente în camera curată
- Cerința pentru USP <797> conformitatea cu inspecția viitoare a FDA
După o evaluare amănunțită, am stabilit că abordările standard de instalare ar depăși timpul de inactivitate disponibil. Descoperirea a venit atunci când am propus o abordare modulară folosind un sistem de chiuvete prefabricate cu utilități integrate care ar putea fi instalate cu o întrerupere minimă a arhitecturii existente.
Am conceput un protocol de izolare personalizat care a menținut izolarea între zona de instalare și spațiile de producție active. Acest lucru a implicat:
- Crearea unui sistem temporar de izolare cu perete moale cu presiune negativă filtrată HEPA
- Stabilirea unui protocol dedicat de transfer de materiale prin intermediul unui sas temporar
- Punerea în aplicare a monitorizării continue a particulelor la limita de izolare
- Programarea muncii în timpul perioadelor de producție minimă
Instalarea efectivă a necesitat o coordonare precisă între echipele mecanice și sanitare. Am preasamblat componentele într-o zonă de staționare controlată, pentru a reduce la minimum munca în încăpere. Chiuveta a sosit cu instalații sanitare instalate din fabrică, necesitând doar conexiunile finale la sistemele instalației.
O provocare semnificativă a apărut atunci când am descoperit că sistemul de drenaj existent nu avea o pantă suficientă pentru a îndeplini cerințele USP (minim ¼" pe picior). În loc de modificări ample ale podelei, am proiectat o conexiune de drenaj personalizată care a încorporat un sistem de pompare integral în dulapul chiuvetei. Această soluție a menținut scurgerea conformă, evitând în același timp modificări structurale costisitoare.
Pentru validare, am elaborat un protocol de testare în trei faze:
- Testarea funcțională inițială a tuturor sistemelor mecanice
- Testarea generării de particule în timpul funcționării pentru a verifica izolarea
- Testarea proceselor simulate cu proceduri de curățare reale
În cele din urmă, proiectul a reușit, fiind finalizat la termen, cu impact zero asupra producției. Punctele cheie ale acestei instalații au inclus:
- Valoarea soluțiilor modulare, pre-proiectate pentru minimizarea fabricației pe teren
- Importanța unei evaluări complete înainte de instalare, chiar și atunci când aceasta pare simplă la început
- Cum rezolvarea creativă a problemelor poate depăși constrângerile aparent inflexibile ale instalațiilor
La șase luni după instalare, clientul a raportat că sistemul de chiuvete a trecut inspecția FDA fără probleme și și-a îmbunătățit eficiența operațională prin reducerea timpului de curățare cu aproximativ 30% în comparație cu configurația anterioară.
Tendințe viitoare în tehnologia chiuvetelor pentru camere curate
Peisajul tehnologiei chiuvetelor pentru camere curate evoluează rapid, datorită progreselor în știința materialelor, automatizării și cerințelor de reglementare. Pe baza colaborării mele cu principalii proiectanți și producători de camere curate, câteva tendințe emergente vor remodela probabil practicile de instalare în următorii ani.
Tehnologia fără atingere se extinde dincolo de simpla acționare a robinetului către sisteme complete care minimizează contactul uman. Sistemele avansate de senzori detectează acum gesturi specifice pentru a controla temperatura, debitul și durata apei fără contact fizic. În timpul unei instalări recente la un centru de terapie celulară, am implementat un sistem complet fără atingere care a încorporat activarea vocală pentru funcții specifice - o tehnologie care ar fi părut science fiction în urmă cu doar cinci ani.
Inovația în materie de materiale este un alt domeniu de dezvoltare semnificativă. Noile suprafețe compozite cu proprietăți antimicrobiene încorporate sunt promițătoare pentru reducerea formării biofilmelor fără tratamente chimice. Aceste materiale încorporează ioni de argint sau cupru care inhibă în mod activ dezvoltarea microbiană. Deși au în prezent un preț superior (de obicei cu 50-100% mai mare decât oțelul inoxidabil standard), costul total de proprietate al acestora pare mai scăzut dacă se iau în considerare cerințele reduse de curățare și riscul de contaminare.
Integrarea cu sistemele de monitorizare a instalațiilor reprezintă probabil cea mai transformatoare tendință. Chiuvetele moderne pentru camere curate sunt echipate din ce în ce mai mult cu:
- Monitoare de flux care detectează modele neobișnuite de utilizare care sugerează defectarea echipamentului
- Senzori de temperatură care asigură parametrii de dezinfecție corespunzători
- Senzori de scurgere care alertează întreținerea cu privire la eventualele blocaje înainte ca acestea să provoace revărsări
- Contoare de utilizare care ajută la optimizarea programelor de întreținere preventivă
Această conectivitate permite întreținerea predictivă, mai degrabă decât reparațiile reactive, reducând drastic timpii morți. O instalație de semiconductoare pentru care am fost consultant a implementat chiuvete conectate la IoT care au redus evenimentele de întreținere neplanificate cu aproape 70% în primul an.
Considerentele legate de durabilitate conduc, de asemenea, la inovații în proiectarea și instalarea chiuvetelor pentru camere curate. Caracteristicile de conservare a apei, cum ar fi comenzile de debit temporizate și sistemele de debit redus asistate de aer pot reduce consumul de apă cu 30-50% fără a compromite eficiența curățării. Având în vedere că operațiunile din camerele curate au adesea o amprentă semnificativă asupra mediului, aceste îmbunătățiri ale eficienței reprezintă un progres semnificativ către obiectivele de sustenabilitate.
Pe măsură ce aceste tehnologii ajung la maturitate, procedurile de instalare vor evolua în mod necesar pentru a acomoda sisteme mai complexe cu cerințe de integrare mai mari. Instalatorii vor avea nevoie de seturi îmbunătățite de competențe care să acopere sistemele tradiționale de instalații sanitare, electronice și de rețea. Această convergență a disciplinelor prezintă atât provocări, cât și oportunități pentru profesioniștii din domeniul infrastructurii camerelor sterile.
Menținerea calității instalării pentru performanță pe termen lung
Calitatea instalării inițiale a unei chiuvete pentru camere curate se corelează direct cu performanța pe termen lung și cu cerințele de întreținere. După ce am finalizat numeroase instalări în diverse industrii, am identificat mai mulți factori critici care determină dacă o chiuvetă va funcționa corect timp de ani de zile sau va deveni o provocare persistentă de întreținere.
Documentația servește drept bază pentru performanța pe termen lung. Creați desene complete după cum a fost construit, care includ:
- Dimensiuni și elevații precise
- Specificațiile materialelor pentru toate componentele
- Specificații de cuplu pentru conexiunile critice
- Fotografii detaliate ale conexiunilor realizate înainte de închidere
- Informații de contact pentru furnizorii de componente specializate
Această documentație devine neprețuită în timpul depanării sau atunci când devin necesare modificări la câțiva ani după instalare. Păstrez copii digitale ale întregii documentații de instalare cu copii de rezervă în cloud - o practică care a salvat un client de un timp de inactivitate semnificativ atunci când a trebuit să modifice o instalație la trei ani după finalizare.
Punerea în funcțiune inițială ar trebui să stabilească performanțele de referință pentru mai mulți parametri:
- Debitul de apă la diferite poziții ale supapei
- Timpii de scurgere sub sarcină standardizată
- Ratele de recuperare a temperaturii apei
- Numărul de particule în timpul funcționării tipice
Aceste linii de bază permit personalului de întreținere să identifice degradări subtile înainte de apariția unor defecțiuni catastrofale. În timpul unei instalații farmaceutice, am descoperit timpi anormali de drenaj în timpul punerii în funcțiune, ceea ce ne-a condus la identificarea și corectarea unei pante necorespunzătoare înainte ca sistemul să intre în producție.
Instruirea personalului instalației cu privire la utilizarea și întreținerea corespunzătoare este adesea neglijată, dar esențială pentru performanța pe termen lung. Elaborați instrucțiuni clare, ilustrate pentru:
- Proceduri zilnice de curățare
- Pași minori de depanare
- Semne de avertizare care necesită intervenție de întreținere
- Tehnici adecvate de utilizare pentru a minimiza uzura
Pentru instalațiile din medii reglementate, stabiliți un protocol de control al modificărilor care să documenteze toate modificările, reparațiile sau ajustările sistemului de chiuvete. Acest lucru creează o înregistrare neîntreruptă a stării sistemului și ajută la prevenirea modificărilor neautorizate care ar putea compromite integritatea camerei curate.
În cele din urmă, cele mai reușite instalații de chiuvete pentru camere curate echilibrează excelența tehnică cu utilitatea practică. O chiuvetă care îndeplinește toate specificațiile tehnice, dar care se dovedește incomodă sau dificil de utilizat, va duce în mod inevitabil la găsirea unor soluții care îi vor compromite funcția prevăzută. Implicând utilizatorii finali în procesul de instalare și abordând preocupările lor practice, veți crea sisteme care își mențin integritatea pe toată durata de funcționare.
Investiția în practici de instalare de calitate pentru sisteme durabile de chiuvete pentru camere curate aduce dividende prin reducerea costurilor de întreținere, îmbunătățirea fiabilității proceselor și îmbunătățirea conformității cu reglementările. Pe măsură ce cerințele camerelor curate continuă să evolueze, această bază de excelență oferă flexibilitatea de a se adapta, menținând în același timp mediul critic controlat de care depind procesele dumneavoastră.
Întrebări frecvente privind instalarea chiuvetelor pentru camere curate
Q: Care sunt principalele considerente pentru alegerea unei locații pentru instalarea chiuvetelor pentru camere curate?
R: Atunci când selectați o locație pentru instalarea chiuvetei pentru camere curate, asigurați-vă că zona este ferită de pericolele electrice și de deteriorarea apei. Suprafața trebuie să fie plană și uscată pentru a susține greutatea chiuvetei, chiar și atunci când este umplută cu apă.
Q: Ce materiale sunt utilizate de obicei în instalarea chiuvetelor pentru camere curate?
R: Chiuvetele pentru camere curate sunt de obicei fabricate din materiale de înaltă calitate, cum ar fi oțelul inoxidabil, care oferă durabilitate și ușurință de curățare. Acest material ajută la menținerea condițiilor sterile necesare într-un mediu de cameră curată.
Q: Cum pregătesc suprafața pentru instalarea chiuvetelor pentru camere curate?
R: Pentru a pregăti suprafața, asigurați-vă că aceasta este plană și uniformă. Dacă instalați chiuveta într-un blat, folosiți un șablon pentru a marca zona de decupare și aplicați silicon de etanșare în jurul marginilor chiuvetei odată instalată, pentru a preveni infiltrarea apei.
Q: Ce protocoale de igienă ar trebui implementate pentru instalarea chiuvetelor pentru camere curate?
R: Protocoalele de igienă adecvate includ asigurarea faptului că toate suprafețele sunt curățate și dezinfectate temeinic înainte și după instalare. Întreținerea regulată a chiuvetei implică monitorizarea acumulării de biofilm și efectuarea de curățări periodice în profunzime pentru menținerea curățeniei.
Q: Pot să-mi personalizez instalarea chiuvetei Cleanroom?
R: Da, vă puteți personaliza chiuveta pentru camere curate prin adăugarea unor caracteristici precum componente aprobate CSA sau NSF, orificii de revărsare și plăci de scurgere detașabile. Aceste personalizări pot spori funcționalitatea și conformitatea cu standardele de reglementare.
Q: Ce beneficii oferă o chiuvetă pentru camere curate în ceea ce privește prevenirea contaminării?
R: Chiuvetele pentru camere curate sunt proiectate cu caracteristici precum suprafețe netede și modele fără crăpături pentru a preveni dezvoltarea microbiană și contaminarea. Acest lucru ajută la menținerea integrității mediului camerei curate prin minimizarea zonelor în care se pot acumula bacterii.
Resurse externe
- Ghid de instalare a chiuvetei pentru camere curate (https://www.isocleanroomchina.com/cleanroom-sink/) - Oferă instrucțiuni pas cu pas pentru instalarea unei chiuvete pentru camere curate, punând accentul pe considerente de siguranță și amplasare.
- Instalarea chiuvetei BioClean Cleanroom (https://www.brysafe.com/products/accessories/cleanroom-sinks) - Oferă chiuvete specializate pentru camere curate, concepute pentru medii controlate, cu instrucțiuni de instalare.
- Producător de mobilier pentru camere curate în China (https://www.isocleanroomchina.com/cleanroom-sink/) - Discută despre tipurile de chiuvete pentru camere curate, inclusiv opțiunile de bază deschise și închise, împreună cu sfaturi de instalare.
- Instalarea chiuvetelor pentru camere curate Gerflor (https://www.gerflor.com/en/solutions/cleanroom-floors) - Deși nu se concentrează exclusiv pe chiuvete, această resursă pune accentul pe proiectarea camerelor curate, care ar putea fi relevantă pentru considerațiile privind instalarea chiuvetelor.
- Chiuvete pentru camere curate Haws (https://www.hawsco.com/products/eye-wash-stations-and-sinks) - Deși nu abordează în mod specific instalarea, acesta oferă chiuvete din oțel inoxidabil adecvate pentru camere curate, care ar putea ghida practicile de instalare relevante.
- Echipamente pentru camere curate Ghid (https://www.terraverde.com/cleanroom-equipment/) - Acoperă o gamă largă de echipamente pentru camere curate, inclusiv chiuvetele, oferind informații despre rolul acestora în menținerea standardelor de igienă și siguranță.
Conținut înrudit:
- Ghidul final pentru chiuvetele din camerele curate [Ediția 2025]
- Drenarea dușurilor chimice: Proiectarea eficientă a sistemului
- Cutii de carcasă HEPA din aluminiu vs oțel inoxidabil 2025
- Calitatea apei în dușurile chimice: Sfaturi de gestionare
- Cabine de duș chimice din oțel inoxidabil: Ghid de durabilitate
- Dulapuri pentru îmbrăcăminte LAF: Avantajele oțelului inoxidabil
- Configurare cutie HEPA montată pe perete pentru spații limitate
- Proceduri de curățare BIBO: Asigurarea sterilității
- Cutii cu carcasă HEPA în producția farmaceutică: Utilizări


