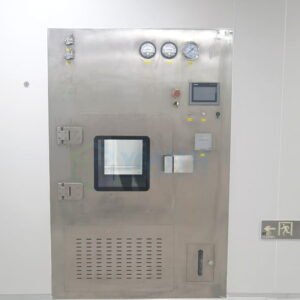
Introducción al mantenimiento de armarios HPL para salas blancas
Mantener la integridad de su entorno de sala limpia requiere una atención meticulosa a cada superficie y componente del espacio, siendo los armarios de almacenamiento uno de los elementos que con más frecuencia se pasan por alto. Recientemente consulté a un fabricante de productos sanitarios que descubrió que los problemas de contaminación de sus productos no procedían de sus procesos o equipos primarios, sino de un mantenimiento inadecuado de los armarios de almacenamiento de HPL. Esta revelación subraya una verdad fundamental: incluso los armarios de sala blanca de mayor calidad requieren un mantenimiento adecuado y constante para cumplir su función de control de la contaminación.
Los armarios de laminado de alta presión (HPL) se han convertido en el estándar de oro en entornos de salas limpias debido a su excepcional durabilidad, resistencia química y propiedades no particulantes. Estas soluciones de almacenamiento especializadas representan una inversión importante en la infraestructura de su sala blanca, ya que un mantenimiento adecuado influye directamente no solo en la vida útil del armario, sino también en el cumplimiento y la eficacia de todas sus operaciones.
Los requisitos de mantenimiento para armarios HPL para salas blancas de YOUTH Tech difieren sustancialmente de las de los armarios estándar de oficina o laboratorio. La construcción hermética, los materiales especializados y la ingeniería de precisión exigen enfoques específicos que preserven tanto la funcionalidad como la compatibilidad con salas limpias. Analicemos las prácticas de mantenimiento esenciales que garantizan que estos componentes críticos sigan cumpliendo su función con eficacia.
Comprender la construcción y los materiales de los armarios HPL
Antes de entrar de lleno en los protocolos de mantenimiento específicos, es esencial comprender qué hace que estos armarios sean únicos. Los armarios HPL diseñados para salas blancas presentan superficies laminadas de alta presión, es decir, láminas de papel impregnadas con resinas termoendurecibles y unidas bajo calor y presión extrema. Esto crea una superficie excepcionalmente duradera y no porosa que resiste los productos químicos, la humedad y el crecimiento microbiano.
Los núcleos de los armarios suelen utilizar materiales especializados, como tableros de partículas o tableros de fibra de densidad media (MDF), que se han seleccionado y procesado para minimizar la generación de partículas. Los bordes se sellan cuidadosamente para evitar la exposición del material del núcleo, normalmente mediante técnicas avanzadas de encintado de bordes o métodos de construcción sin juntas.
Lo explica la Dra. Alison Chen, científica de materiales especializada en entornos de salas blancas: "Los puntos de unión de los armarios para salas blancas representan zonas potenciales de fallo donde pueden generarse partículas o acumularse contaminantes. Los armarios HPL de calidad incorporan ingeniería de precisión en estos puntos de unión para minimizar estos riesgos, pero estas mismas zonas exigen el mantenimiento más vigilante."
¿Qué distingue a Soluciones de armarios HPL de la ebanistería estándar incluye:
- Esquinas interiores redondeadas que eliminan las grietas difíciles de limpiar
- Juntas y sellos especializados para evitar la infiltración de partículas
- Mecanismos de ajuste diseñados para mantener la alineación a pesar del uso frecuente
- Componentes de hardware fabricados con materiales compatibles con salas limpias
- Sistemas de ventilación diseñados para evitar la acumulación de partículas
La comprensión de estos elementos constructivos informa de las estrategias de mantenimiento eficaces, ya que cada componente responde de forma diferente a los agentes de limpieza y requiere una atención específica. Por ejemplo, el método de mantenimiento que preserva las superficies laminadas podría dañar las juntas, lo que pone de relieve la necesidad de protocolos específicos para cada componente.
Consejo Profesional #1: Establecer un calendario de inspecciones periódicas
La base de un mantenimiento eficaz de los armarios de las salas blancas comienza con un programa de inspección estructurado y coherente. En mi experiencia en la implantación de programas de mantenimiento en diversas clasificaciones de salas blancas, he observado que las instalaciones sin protocolos de inspección documentados suelen descubrir los problemas solo después de que hayan afectado a las operaciones.
Para entornos de clase 100 (ISO 5) o más limpios, las inspecciones visuales semanales deben complementarse con exámenes exhaustivos mensuales. Para entornos menos estrictos (ISO 6-8), suelen bastar inspecciones visuales quincenales con inspecciones exhaustivas trimestrales. Documente estas inspecciones utilizando una lista de comprobación normalizada que incluya:
- Sellar la integridad de puertas y cajones
- Alineación correcta de puertas y cajones
- Examen de la superficie en busca de arañazos, desconchones o decoloración.
- Funcionalidad de los herrajes (bisagras, correderas, tiradores)
- Evaluación de la estabilidad (el tambaleo indica posibles problemas estructurales)
James Whittaker, especialista en certificación de salas blancas con más de 20 años de experiencia, aboga por vincular las inspecciones de cabinas a su programa de control medioambiental: "Los recuentos de partículas que se disparan durante el uso de la cabina suelen indicar problemas de mantenimiento. Recomiendo programar inspecciones en profundidad de las cabinas inmediatamente después de que la vigilancia ambiental revele cualquier anomalía."
Un aspecto crítico que a menudo se pasa por alto es la documentación. Mantenga registros detallados de sus inspecciones, incluidas fotografías de cualquier observación preocupante. Estos datos históricos resultan muy valiosos para identificar problemas en desarrollo antes de que se conviertan en críticos y pueden reducir significativamente el tiempo de inactividad y los costes de sustitución.
Consejo Profesional #2: Protocolos de limpieza adecuados
La limpieza de las superficies de los armarios de HPL requiere un delicado equilibrio entre lograr la esterilidad y preservar la integridad del material. El fallo de mantenimiento más común que he observado consiste en utilizar productos de limpieza inadecuados que degradan gradualmente la superficie de HPL o comprometen el hardware especializado.
Para empezar, consulte las directrices del fabricante del armario: los armarios HPL para salas limpias tienen recomendaciones específicas sobre los productos de limpieza compatibles. Por lo general, las soluciones de detergentes suaves o las toallitas especialmente formuladas para salas limpias que contienen alcohol isopropílico (normalmente 70%) funcionan eficazmente sin dañar las superficies.
El procedimiento de limpieza debe seguir esta secuencia:
- Retire todo el contenido de la sección del armario que se va a limpiar
- Aspire las superficies exteriores con un aspirador con filtro HEPA para eliminar las partículas sueltas.
- Limpie las superficies con un paño aprobado para salas limpias humedecido (no saturado) con solución limpiadora.
- Limpiar de arriba abajo, superponiendo los trazos
- Preste especial atención a las asas, bordes y esquinas donde se acumula la contaminación
- Para superficies interiores, limpie en la dirección de las zonas más limpias a las menos limpias.
- Deje que las superficies se sequen completamente antes de volver a colocar el contenido
| Componente del armario | Producto de limpieza recomendado | Frecuencia de limpieza | Consideraciones especiales |
|---|---|---|---|
| Superficies exteriores HPL | 70% Solución IPA | Después de cada turno | Evitar la humedad excesiva alrededor de los bordes |
| Superficies interiores | Limpiador a base de peróxido de hidrógeno | Semanal | Asegurar el secado completo antes de usar |
| Herrajes (tiradores, bisagras) | Solución de detergente suave | Semanal | Evitar materiales abrasivos que rayen el metal |
| Juntas y retenes | Limpiador de juntas especializado | Mensualmente | Comprobación de la degradación tras la limpieza |
| Componentes de ventilación | Aire comprimido + paño con IPA | Mensualmente | Asegurar la desconexión de la alimentación, si procede |
Los errores de limpieza más comunes son:
- Utilizar productos a base de lejía, que pueden deteriorar las juntas y los sellos.
- Aplicación de humedad excesiva que puede penetrar en las costuras
- Utilizar herramientas de limpieza abrasivas que arañan microscópicamente las superficies de HPL, creando refugios para los contaminantes.
- Descuidar la limpieza de las superficies interiores con el mismo rigor que las exteriores
En el caso de operaciones especialmente delicadas, considere la posibilidad de realizar una prueba de residuos después de la limpieza para verificar que no queden restos de productos de limpieza en las superficies de los armarios.
Consejo Profesional #3: Control de la Humedad
La humedad representa una de las mayores amenazas para la longevidad y el rendimiento de los armarios HPL para salas blancas. Aunque las superficies de HPL resisten razonablemente bien la humedad, los elementos de construcción, en particular las bandas de los bordes y los puntos de montaje de los herrajes, pueden ser vulnerables a la infiltración de humedad.
En entornos de salas limpias con alta humedad, como los de procesamiento biológico o determinadas operaciones farmacéuticas, la gestión de la humedad resulta especialmente crítica. El control de los niveles de humedad relativa debe formar parte de su programa de control medioambiental, con alertas activadas cuando los niveles superen los 60% durante periodos prolongados.
El Dr. Marcus Wei, especialista en control ambiental, señala: "Muchas instalaciones se centran exclusivamente en el control de partículas y descuidan la gestión de la humedad. He investigado numerosos fallos de armarios en los que la intrusión de humedad a nivel microscópico creaba refugios para el crecimiento microbiano a pesar de los rigurosos protocolos de limpieza."
Las estrategias prácticas para el control de la humedad incluyen:
- Instalación de paquetes desecantes en el interior de armarios que almacenan artículos sensibles a la humedad
- Garantizar una ventilación adecuada para evitar la condensación, especialmente en armarios cercanos a gradientes de temperatura.
- Tratar inmediatamente cualquier derrame de líquido, especialmente alrededor de las costuras y los bordes.
- Aplicación de un protocolo de secado tras procesos de limpieza en húmedo
- Programar inspecciones más frecuentes de los armarios en zonas de alta humedad.
Preste especial atención a los armarios situados cerca de paredes exteriores, fuentes de agua o límites de control de temperatura, ya que estos lugares experimentan fluctuaciones de humedad más significativas. Considere la posibilidad de utilizar tarjetas indicadoras de humedad en el interior de los armarios que contengan materiales especialmente sensibles para advertir con antelación de posibles problemas de humedad.
Consejo profesional #4: Tratamiento del desgaste y los daños
Incluso con un mantenimiento preventivo meticuloso, los componentes de los armarios de salas blancas muestran inevitablemente signos de desgaste. La diferencia clave entre las instalaciones que sustituyen armarios con frecuencia y las que mantienen una vida útil más larga radica en la intervención temprana y las técnicas de reparación adecuadas.
Al examinar mantenimiento de armarios de salas blancas prácticas, se centran en identificar estas señales tempranas de deterioro:
- Pequeños arañazos en la superficie que podrían albergar contaminantes
- Ligera decoloración que indica exposición química o rotura del material.
- Separación mínima en los bordes o costuras
- Desalineación de puertas o cajones de incluso 1-2 mm
- Comportamiento incoherente de cierre o enclavamiento
- Pequeños desconchones o abolladuras en la superficie del HPL
Para los arañazos superficiales, los compuestos de reparación de HPL especialmente formulados pueden rellenar eficazmente el vacío para restaurar una superficie enrasada y limpiable. Estos compuestos están disponibles en varios colores que combinan con el acabado del mueble y, si se aplican correctamente, pueden hacer que los pequeños daños sean prácticamente indetectables y evitar los focos de contaminación.
La separación de cantos requiere atención inmediata, ya que el material del núcleo expuesto puede deteriorarse rápidamente y generar partículas. Los adhesivos especializados compatibles con salas limpias pueden volver a unir estas separaciones, pero la reparación debe realizarse con una atención meticulosa para eliminar cualquier hendidura.
Durante mi trabajo de consultoría con un fabricante de semiconductores, implantamos un sistema de "umbral de reparación", documentando criterios específicos que determinan si un problema justifica la reparación o la sustitución. Este enfoque sistemático evita la toma de decisiones subjetivas que a menudo conducen a una sustitución prematura o a un retraso peligroso en la resolución de daños importantes.
| Tipo de daño | Enfoque de reparación | Indicador de sustitución | Mitigación provisional |
|---|---|---|---|
| Arañazos superficiales < 0,5 mm de profundidad | Rellenar con compuesto de reparación HPL | Arañazos > 0,5 mm de profundidad o que cubran >10% de superficie. | Cubrir con cinta compatible con salas limpias hasta que sea posible la reparación |
| Separación de bordes < 3 mm | Vuelva a aplicar el adhesivo para salas blancas | Separación >3 mm o evidencia de daños en el material del núcleo | Sellar temporalmente con sellador de silicona aprobado |
| Aflojamiento de los herrajes | Apriete y asegure con fijador de roscas | Desprendimiento de roscas o deformación de componentes | Sustituya los componentes de hardware individuales si es posible |
| Desgaste de juntas | Limpiar y aplicar lubricante para juntas | Desgarros, fragilidad o juego de compresión | Sustitución temporal de la junta por material compatible |
Recuerde que cualquier intervención de reparación debe seguir los protocolos de sala blanca, con la contención adecuada para evitar que el proceso de reparación contamine el entorno.
Consejo profesional #5: Optimización de la carga y organización de armarios
La forma en que cargue y organice sus armarios para salas blancas influye directamente en sus requisitos de mantenimiento y longevidad. Una carga inadecuada genera tensiones mecánicas que aceleran el desgaste de bisagras, guías y elementos estructurales.
Durante un reciente proyecto de optimización de una sala blanca, observé que los técnicos sobrecargaban habitualmente los cajones inferiores y dejaban infrautilizadas las zonas de almacenamiento superiores. Esta práctica habitual concentra el peso de tal forma que sobrecarga los marcos de los armarios y puede provocar desajustes sutiles que, en última instancia, afectan al sellado de las puertas.
Siga estas buenas prácticas de carga:
- Distribuya el peso uniformemente por todo el armario, colocando los objetos más pesados en las secciones inferiores.
- Nunca sobrepase los límites de peso especificados por el fabricante para los estantes y cajones.
- Utilice separadores y organizadores de cajones para evitar que los objetos se desplacen
- Mantenga un espacio libre entre los artículos almacenados y las paredes/techo del armario.
- Implemente una política de "limpieza a medida que avanza" en la que los usuarios limpien las superficies después de acceder a los materiales almacenados.
Los sistemas de organización contribuyen significativamente a la longevidad de los armarios. Considere la posibilidad de utilizar insertos y divisores de cajones personalizados compatibles con salas limpias que impidan que los artículos entren en contacto directo con los laterales y el fondo de los cajones. Estas ayudas organizativas distribuyen el peso de forma más eficaz y minimizan la abrasión en las superficies interiores.
Para las instalaciones que almacenan productos químicos u otras sustancias potencialmente dañinas, aplique estrategias de contención secundaria utilizando bandejas o revestimientos compatibles. De este modo se evita que los derrames accidentales entren en contacto directo con las superficies del armario, lo que reduce significativamente el riesgo de degradación del material.
También hay que tener en cuenta la colocación de los objetos de uso más frecuente. Los objetos de uso diario deben colocarse de forma que se minimicen los ángulos y la duración de la apertura de la puerta, reduciendo así la tensión sobre bisagras y juntas. Esta optimización aparentemente menor puede prolongar considerablemente la vida útil de los herrajes, sobre todo en las unidades de almacenamiento a las que se accede con frecuencia.
Consejo Profesional #6: Calibración y Ajuste de Piezas Móviles
Los componentes móviles diseñados con precisión de los armarios para salas blancas de alta calidad requieren una calibración y un ajuste regulares para mantener un funcionamiento correcto. Las bisagras de las puertas, las guías de los cajones y los mecanismos de cierre que funcionan a la perfección cuando son nuevos se desplazarán gradualmente de su posición óptima con el uso normal.
En mi experiencia en la aplicación de programas de mantenimiento preventivo para salas blancas farmacéuticas, he comprobado que el ajuste trimestral de estos componentes puede prolongar su vida útil 40-60% en comparación con las instalaciones que sólo se ocupan de estos elementos tras un mal funcionamiento perceptible.
Para las bisagras, comprobar y ajustar:
- Alineación de las puertas (las puertas deben estar paralelas al marco del armario)
- Presión de cierre (las puertas deben cerrarse completamente sin dar portazos)
- Estanqueidad de las bisagras (no se tambalean al accionar las puertas)
La mayoría de los armarios HPL de calidad incorporan bisagras ajustables con tornillos de fijación que permiten realizar pequeñas correcciones sin necesidad de desmontarlos por completo. Al realizar estos ajustes, utilice únicamente lubricantes compatibles con salas limpias y aprobados específicamente para su clasificación ambiental. Los aceites y grasas estándar pueden desprender gases o atraer partículas, comprometiendo la integridad de su sala limpia.
Las guías de los cajones suelen tener puntos de ajuste para la altura, la alineación lateral y la extensión. La intervención temprana cuando los cajones empiezan a mostrar una ligera desalineación evita el desgaste acelerado que se produce una vez que los componentes empiezan a atascarse o a acumularse durante el funcionamiento.
"La técnica de mantenimiento que más se pasa por alto tiene que ver con la propia secuencia de ajuste", explica Thomas Rodríguez, especialista en mobiliario para salas blancas. "Muchos técnicos ajustan las bisagras de las puertas individualmente, pero este enfoque suele crear errores de compensación. En su lugar, afloje ligeramente todas las bisagras, alinee la puerta correctamente y, a continuación, vuelva a apretarlas sistemáticamente de arriba abajo."
Para los mecanismos de enclavamiento, las pruebas periódicas de funcionamiento deben incluir:
- Verificación del cierre seguro
- Suavidad de funcionamiento
- Alineación correcta con los cerraderos o cierres
- Sin atascos ni rozamientos excesivos
Documente todos los ajustes en sus registros de mantenimiento, anotando la dirección y la magnitud aproximada de los cambios. Esta documentación ayuda a identificar patrones de desarrollo que podrían indicar problemas estructurales que requieren una intervención más exhaustiva.
Consejo profesional #7: Implantación de un programa de mantenimiento preventivo
La transición del mantenimiento reactivo al preventivo representa la oportunidad más importante para prolongar la vida útil de los armarios y reducir al mismo tiempo las interrupciones operativas. Un programa completo de mantenimiento preventivo integra inspección, limpieza, ajuste y documentación en un sistema cohesionado.
Empiece por crear un registro central de mantenimiento para todos los armarios de salas blancas, asignando a cada unidad un identificador único y documentándolo:
- Fecha de instalación
- Información sobre el fabricante y el modelo
- Ubicación y caso de uso
- Historial de mantenimiento
- Incidentes o reparaciones destacables
A continuación, elabore un programa de mantenimiento escalonado con actividades claramente definidas:
| Nivel de mantenimiento | Frecuencia | Actividades | Personal | Documentación |
|---|---|---|---|---|
| Diario | Cada turno | Inspección visual, limpieza de superficies, comprobación de la organización | Operarios de salas blancas | Lista de control digital con informe de excepciones |
| Semanal | Cada 7 días | Limpieza a fondo, inspección del hardware, ajustes básicos | Técnicos formados | Informe de estado detallado con imágenes |
| Trimestral | Cada 90 días | Inspección exhaustiva, calibración de todas las piezas móviles, verificación del sellado | Especialistas en mantenimiento | Evaluación completa con mediciones y resultados de pruebas |
| Anual | Cada 12 meses | Desmontaje completo de componentes críticos, sustitución de elementos de desgaste, evaluación estructural | Personal de servicio cualificado o fabricante | Documentación de certificación con verificación de resultados |
La eficacia de su programa de mantenimiento preventivo depende en gran medida de la formación del personal. Desarrolle módulos de formación específicos para cada nivel de mantenimiento, asegurándose de que todo el personal comprende no sólo los procedimientos, sino también el razonamiento que los sustenta. He comprobado que el cumplimiento de las normas de mantenimiento mejora drásticamente cuando el personal entiende cómo contribuyen sus esfuerzos al rendimiento general de la sala blanca.
Los sistemas digitales de seguimiento pueden mejorar significativamente la eficacia de los programas de mantenimiento. Varias plataformas de GMAO (sistema informatizado de gestión del mantenimiento) especializadas ofrecen ahora módulos específicos para salas blancas que permiten programar actividades de mantenimiento, realizar un seguimiento de su ejecución, analizar tendencias e incluso predecir posibles fallos basándose en datos históricos.
Un análisis coste-beneficio del mantenimiento preventivo para soluciones de almacenamiento HPL de alta calidad suele mostrar un retorno de la inversión en un plazo de 12 a 18 meses, principalmente a través de la prolongación de la vida útil de los equipos y la reducción de las interrupciones operativas. En una implantación reciente para un fabricante de dispositivos médicos, documentamos una reducción de 34% en los informes de desviación relacionados con armarios tras implantar un programa integral de mantenimiento preventivo.
Conclusión: El valor a largo plazo de un mantenimiento adecuado de los armarios
El mantenimiento de los armarios HPL para salas blancas representa un aspecto crítico, pero a menudo infravalorado, de la gestión de salas blancas. Los siete consejos profesionales descritos anteriormente, desde el establecimiento de calendarios de inspección hasta la aplicación de programas integrales de mantenimiento preventivo, constituyen un marco para maximizar el rendimiento y la longevidad de estos sistemas de almacenamiento esenciales.
La disciplina necesaria para el mantenimiento constante de los armarios aporta beneficios que van mucho más allá de los propios armarios. Los sistemas de almacenamiento bien mantenidos contribuyen al control general de la contaminación, favorecen la eficacia de los flujos de trabajo y demuestran el cumplimiento de la normativa mediante la documentación de procesos metódicos.
Y lo que es más importante, los hábitos que se adquieren prestando una atención minuciosa a estos componentes aparentemente menores cultivan una cultura más amplia de precisión y cuidado que define las operaciones en salas blancas verdaderamente excepcionales. Al tratar sus sistemas de almacenamiento de alto rendimiento con la misma atención meticulosa que se presta a los equipos de producción, crea un entorno en el que la calidad es realmente integral.
Recuerde que cada entorno de sala blanca presenta desafíos únicos: el enfoque de mantenimiento óptimo para sus instalaciones debe adaptarse a sus operaciones, condiciones ambientales y requisitos normativos específicos. Al adaptar estos principios básicos a su contexto particular, desarrollará una estrategia de mantenimiento que garantice que sus armarios HPL ofrecen un servicio fiable durante todo su ciclo de vida útil previsto.
Preguntas frecuentes sobre el mantenimiento de armarios para salas blancas
Q: ¿Cuál es la importancia del mantenimiento de los armarios de una sala blanca en un entorno controlado?
R: El mantenimiento de los armarios de las salas blancas es crucial para mantener la limpieza y la eficacia del entorno de la sala blanca. Un mantenimiento adecuado garantiza que los armarios no se conviertan en fuentes de contaminación, preservando así la calificación ISO de la sala blanca y garantizando la calidad de los productos o procesos que se realicen en ella.
Q: ¿Con qué frecuencia debo realizar el mantenimiento rutinario de los armarios para salas blancas?
R: El mantenimiento rutinario de los armarios de las salas limpias debe realizarse diariamente para garantizar una limpieza óptima. Esto incluye inspeccionar los armarios en busca de daños o contaminación y utilizar productos de limpieza aprobados para mantener sus superficies sin dejar residuos.
Q: ¿Cuáles son los pasos clave en el mantenimiento de los armarios para salas blancas?
R: Los pasos clave en el mantenimiento de los armarios para salas blancas incluyen:
- Inspección periódica para detectar contaminación o daños.
- Utilizar productos de limpieza autorizados que sean compatibles con los materiales del armario.
- Garantizar que todo el personal siga estrictamente los protocolos de vestimenta e higiene al acceder a los armarios.
Q: ¿Cómo puedo evitar la contaminación de los armarios de sala blanca?
R: La prevención de la contaminación de los armarios de sala limpia implica:
- Limpieza y desinfección periódicas con métodos adecuados.
- Garantizar cierres herméticos para evitar la entrada de partículas.
- Almacenar los artículos de forma que se evite la contaminación cruzada.
Q: ¿Puedo utilizar productos de limpieza normales para el mantenimiento de la cabina de la sala blanca?
R: No, no deben utilizarse productos de limpieza normales para el mantenimiento de los armarios de las salas limpias. Para evitar la contaminación y mantener el cumplimiento de las normas para salas limpias, solo deben utilizarse productos de limpieza aprobados y diseñados específicamente para salas limpias.
Q: ¿Cuáles son algunas de las ventajas del mantenimiento periódico de los armarios de salas blancas?
R: El mantenimiento periódico de los armarios de las salas blancas ofrece varias ventajas, como la prolongación de la vida útil de los equipos, la reducción del tiempo de inactividad y el cumplimiento de las normas reglamentarias. También ayuda a mantener la eficiencia y limpieza generales del entorno de la sala blanca.
Recursos externos
- Guía de mantenimiento de armarios para salas blancas - Esta guía proporciona pasos detallados y las mejores prácticas para el mantenimiento de los armarios de salas blancas con el fin de garantizar un rendimiento óptimo y minimizar los riesgos de contaminación.
- Consejos para el mantenimiento de los armarios de las salas blancas - Ofrece asesoramiento experto sobre limpieza, calibración y comprobaciones periódicas para mantener el buen funcionamiento de las cabinas de salas blancas.
- Mantenimiento del mobiliario de salas blancas - Proporciona información sobre el mantenimiento de todo tipo de mobiliario para salas blancas, incluidos los armarios, para preservar la limpieza y funcionalidad de la sala.
- Mantenimiento de equipos de salas blancas - Aunque no se centra exclusivamente en los armarios, este recurso ofrece información valiosa sobre el mantenimiento de diversos equipos para salas blancas, incluidos los armarios y el mobiliario relacionado.
- Mantenimiento de soluciones de almacenamiento para salas blancas - Explica cómo mantener las soluciones de almacenamiento en salas limpias, como los armarios, para garantizar que sigan siendo funcionales y libres de contaminación.
- Diseño y mantenimiento de salas blancas - Aunque no se centra específicamente en los armarios, este recurso ofrece orientaciones completas sobre el diseño y el mantenimiento de salas blancas, que incluyen consideraciones sobre la colocación y el mantenimiento de los armarios.
Contenidos relacionados:
- La guía definitiva de los armarios HPL para salas blancas [2025]
- Armarios HPL vs Acero Inoxidable: ¿Cuál le conviene más?
- 5 pasos esenciales para instalar correctamente un armario de HPL
- Cabinas de bioseguridad de clase I: Características y usos
- Cabinas de bioseguridad de clase II A2: Características y usos
- Armarios de confección LAF en la fabricación farmacéutica
- Armarios para ropa LAF: Soluciones de almacenamiento para salas blancas
- Armarios para ropa LAF para varias clases de salas limpias
- Armarios para ropa LAF: Opciones de almacenamiento integradas


