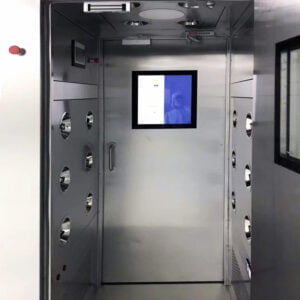
Installing a BIBO system can be a game-changer for your home or office, providing instant access to purified, temperature-controlled water. Whether you're a DIY enthusiast or simply looking to upgrade your water dispensing solution, this comprehensive guide will walk you through the process of installing your BIBO system step by step. From preparing your space to connecting the water supply and setting up the device, we'll cover everything you need to know to get your BIBO system up and running smoothly.
The BIBO system installation process involves several key steps, including identifying the appropriate location, connecting the water supply, setting up the filtration system, and configuring the device settings. Throughout this guide, we'll break down each stage of the installation, providing detailed instructions and helpful tips to ensure a successful setup. We'll also address common challenges you might encounter and offer solutions to overcome them.
As we delve into the intricacies of BIBO system installation, it's important to note that while the process is designed to be user-friendly, attention to detail and careful adherence to instructions are crucial for optimal performance. Let's begin our journey to transform your water dispensing experience with the BIBO system.
The BIBO system installation process is designed to be straightforward, allowing most users to complete the setup without professional assistance. However, it's essential to follow each step carefully to ensure proper functioning and longevity of the device.
What are the key considerations before starting the BIBO system installation?
Before diving into the installation process, it's crucial to prepare adequately and consider several important factors. This preparation will ensure a smooth installation and optimal performance of your BIBO system.
The first step is to choose an appropriate location for your BIBO system. Consider factors such as proximity to a water source, electrical outlet availability, and ease of access for daily use and maintenance.
Next, gather all necessary tools and materials. While the BIBO system comes with most required components, you may need additional tools like a wrench or screwdriver, depending on your specific installation scenario.
Proper preparation is key to a successful BIBO system installation. Ensuring you have all necessary components and choosing the right location can significantly streamline the process.
It's also important to familiarize yourself with local plumbing codes and regulations. Some areas may have specific requirements for water system installations, and being aware of these can prevent potential issues down the line.
| Preparation Checklist |
|---|
| Choose suitable location |
| Gather necessary tools |
| Check local regulations |
| Review installation manual |
Lastly, thoroughly read through the installation manual provided with your BIBO system. This will give you a comprehensive overview of the process and help you anticipate any challenges specific to your model.
By taking these preparatory steps, you'll be well-equipped to begin the installation process with confidence, setting the stage for a successful setup of your BIBO system.
How do you identify and connect the water supply for the BIBO system?
Identifying and connecting the water supply is a crucial step in the BIBO system installation process. This stage requires careful attention to ensure a secure and leak-free connection.
Begin by locating the cold water supply line in your chosen installation area. This is typically found under a sink or behind an appliance. Once identified, shut off the water supply to this line before proceeding.
Next, you'll need to install a T-connector to split the water flow between your existing fixtures and the BIBO system. This connector should be included in your BIBO installation kit.
Proper connection to the water supply is critical for the BIBO system's functionality. Ensuring a secure, leak-free connection will prevent water damage and ensure consistent performance.
After installing the T-connector, connect the provided water supply tube to the BIBO system. Make sure all connections are tight and secure to prevent leaks.
| Water Connection Steps |
|---|
| Locate cold water supply |
| Shut off water |
| Install T-connector |
| Connect supply tube |
| Check for leaks |
Before finalizing the connection, it's advisable to flush the water line to remove any debris that might have accumulated during the installation process. This can be done by running water through the system for a few minutes before connecting it to the BIBO unit.
Remember, if you're unsure about any aspect of the water supply connection, it's always best to consult a professional plumber. The YOUTH website offers additional resources and support for BIBO system installations, which can be particularly helpful during this critical stage.
What are the steps for setting up the filtration system in your BIBO unit?
Setting up the filtration system is a key component of the BIBO system installation process. This system ensures that you have access to clean, purified water at all times.
Start by locating the filtration compartment in your BIBO unit. This is typically easily accessible and designed for user-friendly filter changes.
Next, unpack the filters provided with your BIBO system. Most BIBO models use a multi-stage filtration process, so you may have more than one filter to install.
The filtration system is the heart of your BIBO unit, ensuring high-quality, purified water. Proper installation of filters is crucial for optimal performance and water quality.
Carefully insert each filter into its designated slot, following the arrows or indicators that show the correct orientation. Ensure each filter is securely seated to prevent any water leakage.
| Filtration Setup Steps |
|---|
| Locate filter compartment |
| Unpack filters |
| Insert filters correctly |
| Secure filter housing |
| Prime the system |
After installing the filters, close and secure the filter housing. Some BIBO models may require you to twist or lock the housing in place.
Finally, you'll need to prime the filtration system. This typically involves running water through the system for a few minutes to activate the filters and flush out any manufacturing residues.
Remember, regular filter changes are essential for maintaining water quality. The BIBO system installation guide provides details on filter lifespan and replacement procedures, ensuring you can easily maintain your system's performance over time.
How do you configure the BIBO system settings for optimal performance?
Configuring your BIBO system settings is the final step in the installation process, allowing you to customize the unit to your specific needs and preferences.
Begin by powering on your BIBO system. Most models will guide you through an initial setup process, which includes setting the date and time.
Next, you'll want to configure the temperature settings for both hot and cold water. BIBO systems typically allow you to set precise temperatures to suit your preferences.
Proper configuration of your BIBO system ensures that it operates efficiently and meets your specific needs. Taking the time to set up these features correctly will enhance your overall experience with the device.
If your BIBO model includes advanced features like energy-saving modes or scheduled operation times, take the time to set these up as well. These features can help optimize energy usage and ensure water is ready when you need it.
| Configuration Steps |
|---|
| Power on the system |
| Set date and time |
| Configure temperatures |
| Set up advanced features |
| Test all functions |
Many BIBO systems also include a self-cleaning or sterilization feature. Make sure to activate this function and set it to run regularly to maintain the hygiene of your unit.
Finally, test all functions of your BIBO system to ensure everything is working correctly. This includes dispensing water at different temperatures and testing any additional features your model may have.
For detailed instructions on configuring your specific BIBO model, refer to the BIBO system installation guide , which provides comprehensive information tailored to your unit.
What maintenance procedures should be followed after BIBO system installation?
After successfully installing your BIBO system, it's important to establish a regular maintenance routine to ensure its longevity and optimal performance.
Start by familiarizing yourself with the recommended cleaning schedule for your BIBO model. This typically involves regular external cleaning and periodic internal sanitization.
One of the most critical maintenance tasks is replacing the filters according to the manufacturer's recommendations. This ensures that your water remains clean and free from contaminants.
Regular maintenance is key to preserving the efficiency and lifespan of your BIBO system. By following the recommended procedures, you can ensure consistently high-quality water and prevent potential issues.
Periodically check all connections and tubes for any signs of wear or leakage. Prompt attention to any issues can prevent water damage and ensure continuous operation.
| Maintenance Tasks |
|---|
| Regular cleaning |
| Filter replacement |
| Connection checks |
| Descaling (if necessary) |
| Annual professional service |
If you live in an area with hard water, descaling your BIBO system may be necessary. The frequency of this process depends on your water quality and usage patterns.
Consider scheduling an annual professional service to ensure all components are functioning correctly and to address any potential issues before they become problematic.
By adhering to these maintenance procedures, you can enjoy the benefits of your BIBO system for years to come, ensuring a constant supply of clean, temperature-controlled water for your home or office.
How do you troubleshoot common issues during BIBO system installation?
While the BIBO system installation process is designed to be straightforward, you may encounter some challenges along the way. Being prepared to troubleshoot common issues can help ensure a smooth setup.
One frequent issue is difficulty in connecting the water supply. If you're experiencing leaks or unable to establish a secure connection, double-check all fittings and ensure they're properly tightened. Using plumber's tape on threaded connections can also help prevent leaks.
Another common challenge is air in the system, which can affect water flow and quality. Most BIBO systems have a purge function to remove air bubbles. Run this cycle as directed in your installation guide.
Encountering issues during installation is not uncommon, but most can be easily resolved. Patience and careful adherence to the troubleshooting steps in your installation guide can help overcome these challenges.
If your BIBO system isn't powering on or shows error messages, check the electrical connection and ensure the unit is properly plugged in. Some models may have a reset button that can resolve electronic issues.
| Common Issues and Solutions |
|---|
| Water leaks – Check connections |
| Air in system – Run purge cycle |
| Power issues – Check connection/reset |
| Filter problems – Ensure correct installation |
| Temperature inconsistencies – Recalibrate settings |
Problems with water temperature or taste often indicate issues with the filtration system. Ensure all filters are correctly installed and seated properly in their housings.
If you encounter persistent issues that you're unable to resolve, don't hesitate to contact BIBO customer support. They can provide expert guidance and, if necessary, arrange for professional assistance to complete your installation.
Remember, proper installation is crucial for the optimal performance of your BIBO system. Taking the time to troubleshoot and resolve any issues during setup will ensure a better experience in the long run.
What are the best practices for maintaining water quality in your BIBO system?
Maintaining high water quality is a primary concern for BIBO system users. By following best practices, you can ensure that your system consistently delivers clean, great-tasting water.
Regular filter replacement is the cornerstone of maintaining water quality. Adhere to the manufacturer's recommended schedule for changing filters, which typically varies based on usage and water quality in your area.
Sanitizing your BIBO system periodically is also crucial. Many models have a built-in sanitization cycle, but you may need to run it manually according to the manufacturer's instructions.
Consistent maintenance of your BIBO system is essential for preserving water quality. Regular filter changes and sanitization not only ensure clean water but also protect the longevity of your system.
Pay attention to the quality of your input water. If you live in an area with particularly hard or contaminated water, you may need to consider additional pre-filtration options to protect your BIBO system.
| Water Quality Maintenance Tips |
|---|
| Regular filter replacement |
| Periodic sanitization |
| Monitor input water quality |
| Clean exterior and dispensing area |
| Run water daily |
Regularly clean the exterior of your BIBO system, particularly the dispensing area, to prevent the buildup of bacteria or mold. Use a mild, non-abrasive cleaner to avoid damaging the unit.
If you're away for an extended period, it's a good idea to run water through the system daily or implement a flushing routine to prevent stagnation in the pipes and tanks.
By implementing these best practices, you can ensure that your BIBO system continues to provide high-quality water, enhancing your hydration experience and protecting your investment in the long term.
How can you maximize energy efficiency with your BIBO system?
Maximizing the energy efficiency of your BIBO system not only reduces your environmental impact but can also lead to significant cost savings over time. Understanding and optimizing your system's energy use is key to achieving these benefits.
Start by familiarizing yourself with your BIBO model's energy-saving features. Many units have programmable timers that allow you to set operating hours, ensuring the system is only active when needed.
Adjust the temperature settings to optimal levels. While it's tempting to set the hot water to its maximum, a slightly lower temperature can still meet most needs while consuming less energy.
Optimizing your BIBO system's energy efficiency not only reduces costs but also extends the lifespan of the unit. Small adjustments in settings and usage patterns can lead to significant energy savings over time.
Consider the placement of your BIBO system. Locating it away from heat sources and direct sunlight can help maintain efficiency, particularly for the cooling functions.
| Energy Efficiency Tips |
|---|
| Use programmable timers |
| Optimize temperature settings |
| Consider unit placement |
| Maintain regular cleaning |
| Implement sleep mode |
Regular cleaning and maintenance, including timely filter replacements, help the system operate more efficiently. A well-maintained unit requires less energy to produce clean, temperature-controlled water.
If your BIBO model has a sleep mode or eco-mode, make use of it during periods of low usage. This feature can significantly reduce energy consumption without compromising the availability of water when you need it.
By implementing these energy-efficient practices, you can enjoy the convenience of your BIBO system while minimizing its energy footprint, aligning with both economic and environmental considerations.
In conclusion, installing a BIBO system is a straightforward process that can greatly enhance your access to clean, temperature-controlled water. By following this comprehensive guide, you can navigate each step of the installation with confidence, from preparing your space to configuring the final settings. Remember to pay close attention to the water supply connection, filtration system setup, and initial configuration to ensure optimal performance.
Regular maintenance, including filter replacements and periodic sanitization, is crucial for maintaining water quality and system efficiency. Be prepared to troubleshoot common issues, and don't hesitate to seek professional help if needed. By adhering to best practices for water quality maintenance and energy efficiency, you can maximize the benefits of your BIBO system while minimizing its environmental impact.
Whether you're installing a BIBO system in your home or office, this guide provides you with the knowledge and steps necessary for a successful setup. With your new BIBO system in place, you'll enjoy the convenience and quality of purified, temperature-controlled water at your fingertips. Remember, proper installation and maintenance are key to ensuring your BIBO system provides years of reliable service, enhancing your daily hydration experience.
External Resources
- BIBO Bar Installation Guide – Comprehensive step-by-step instructions for installing a BIBO bar, including water supply connection and initial setup procedures.
- BIBO User Manual – Detailed manual covering installation, usage, and maintenance of BIBO systems, including self-installation steps and initial setup guidance.
- BIBO Support: Troubleshooting Guide – Resource for addressing common installation and operational issues with BIBO systems.
- YouTube: BIBO Bar Installation Tutorial – Visual guide demonstrating the installation process of a BIBO bar system.
- Home Improvement Forum: BIBO Installation Tips – User-generated content and practical advice for installing BIBO systems from experienced homeowners.
- Plumbing Basics for Water Dispenser Installation – General guide on plumbing considerations for installing water dispensers, applicable to BIBO system installation.
Related Contents:
- 7 BIBO System Maintenance Tips for Longevity
- Water Quality in Chemical Showers: Management Tips
- Maintaining BIBO Filter Housings: Best Practices for Optimal Performance
- Troubleshooting BIBO Filter Housing Issues: A Comprehensive Guide
- Water Supply for Chemical Showers: System Design Guide
- The Intricate World of BIBO Filter Housing
- The Cost-Effectiveness of BIBO Systems in Industrial Applications
- Essential BIBO System Components Explained
- BIBO vs. Traditional Containment: Which is Better?


