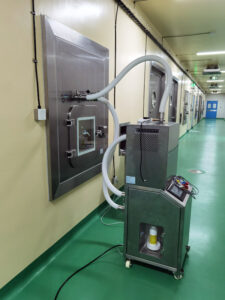
Understanding Weighing Booth Fundamentals
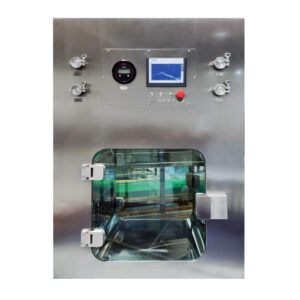
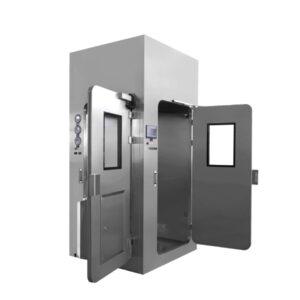
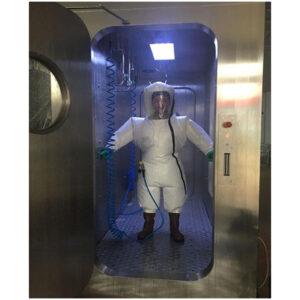
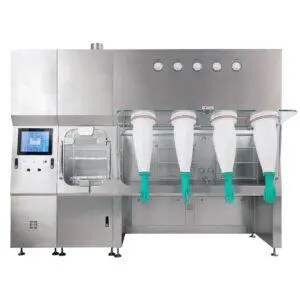
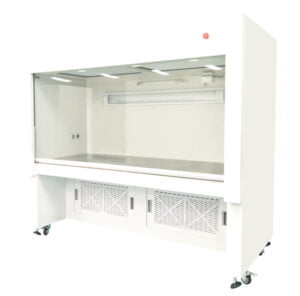
The precision required in pharmaceutical manufacturing, chemical laboratories, and research facilities demands exacting standards for weighing processes. A weighing booth serves as a controlled environment where sensitive materials can be accurately measured without contamination or environmental interference. Unlike ordinary workstations, these specialized enclosures combine laminar airflow technology, HEPA filtration, and precise pressure control to create an ISO-classified clean workspace.
Last month, I was consulting at a pharmaceutical production facility where weighing accuracy directly impacted medication potency. The quality assurance manager explained something that stuck with me: “Even a 0.1% error in active ingredient measurement could mean the difference between therapeutic efficacy and treatment failure.” This conversation underscored why proper calibration isn’t just a technical requirement—it’s a critical safeguard for product quality and patient safety.
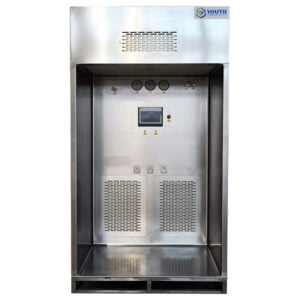
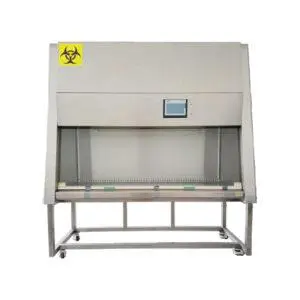
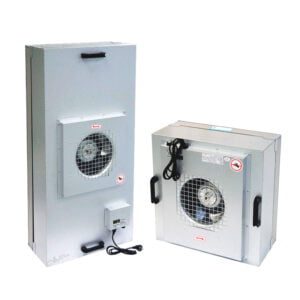
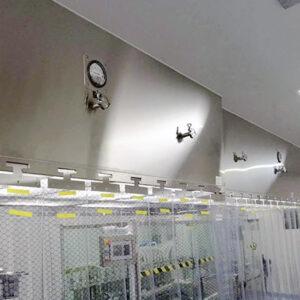
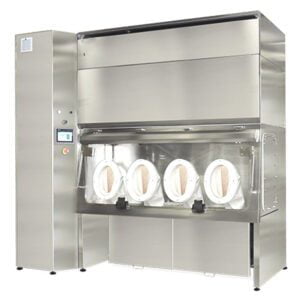
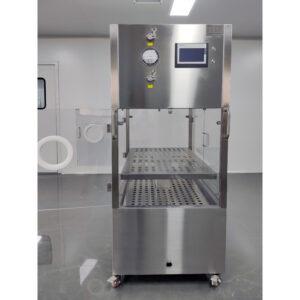
The basic structure of a weighing booth typically includes a workstation with vertical laminar airflow, HEPA or ULPA filtration systems, controlled lighting, and often an antistatic worksurface. These components work in concert to prevent cross-contamination and ensure weighing integrity. YOUTH Tech designs these systems with particular attention to ergonomic considerations and regulatory compliance, which becomes especially important during the calibration process.
Before delving into calibration steps, it’s worth noting that weighing booths exist along a spectrum of complexity. Some facilities utilize basic powder containment workstations, while others implement fully-integrated systems with advanced monitoring capabilities. The calibration principles remain consistent across this spectrum, though the specific parameters may vary.
What many professionals overlook is that calibration isn’t a one-time event but rather an ongoing process requiring periodic verification. Industry data suggests that even well-maintained weighing booths can experience gradual drift in critical parameters, potentially compromising both product quality and operator safety if left unchecked.
Pre-Calibration Assessment and Preparation
Before undertaking the calibration process, a thorough assessment of both the equipment and environment is essential. I’ve witnessed well-intentioned calibration attempts fail simply because proper preparation was neglected. This preparatory phase establishes the foundation for accurate calibration results.
First, gather the necessary tools and instruments. You’ll typically need:
| Tool/Instrument | Purpose | Specifications |
|---|---|---|
| Calibrated anemometer | Airflow velocity measurement | ±3% accuracy, range 0.2-20 m/s |
| Differential pressure gauge | Pressure verification | Resolution of 0.001″ WC (Water Column) |
| Particle counter | Cleanliness classification | 0.3μm and 0.5μm detection capability |
| Certified calibration weights | Balance verification | Class F1 or better, depending on balance sensitivity |
| Temperature/humidity monitor | Environmental parameter tracking | ±0.5°C, ±2% RH accuracy |
| DOP/PAO aerosol generator | HEPA filter integrity testing | 0.3μm particle generation |
| Photometer | Detecting filter leakage | Sensitivity to 0.001% penetration |
Equally important is ensuring appropriate documentation is at hand. This should include:
- Original manufacturer specifications for the dispensing booth or weighing booth
- Previous calibration records
- Relevant SOPs (Standard Operating Procedures)
- Regulatory requirements specific to your industry
- Calibration certificates for all measuring instruments
The environmental conditions surrounding the booth must be stable before calibration begins. Temperature fluctuations, excessive humidity, or air currents from nearby HVAC systems can significantly skew calibration results. I recommend monitoring these conditions for 24 hours prior to calibration to establish baseline stability.
A particular challenge I encountered while working with a cosmetics manufacturer involved excessive vibration from nearby equipment affecting balance readings. We discovered this only after multiple failed calibration attempts. The solution involved scheduling calibration during production downtime—an example of how facility-specific issues can impact the calibration process.
Don’t underestimate the importance of personnel preparation either. The technician performing the calibration should be properly trained and familiar with both the equipment and relevant standards. For regulated industries, qualification documentation for personnel might also be required.
Step 1: Establishing Baseline Environmental Parameters
The first concrete step in calibrating your weighing booth involves documenting and establishing control over environmental parameters. These baseline measurements will serve as reference points throughout the calibration process and for future verifications.
Temperature stability is paramount for accurate weighing operations. Even minor temperature fluctuations can cause thermal expansion or contraction of sensitive components, leading to measurement drift. The ideal temperature range for most applications is 20-22°C (68-72°F) with fluctuations limited to ±1°C during operation.
During a pharmaceutical calibration project last year, we tracked temperature gradients within the booth and discovered a 1.8°C difference between the upper and lower portions of the workspace—enough to affect micogram-level measurements. The issue stemmed from heat generated by the lighting system, which required modification to the booth’s cooling system.
Humidity represents another critical parameter. Excessive moisture can cause hygroscopic materials to absorb water, while static electricity becomes problematic in exceptionally dry conditions. Most applications require relative humidity between 45-55%, though specific processes may have different requirements.
Record these baseline measurements in a calibration log with timestamps, noting any potential external factors that might influence readings:
| Parameter | Target Range | Actual Reading | Notes |
|---|---|---|---|
| Temperature | 20-22°C | 21.3°C | Stable for 4 hours prior to calibration |
| Relative Humidity | 45-55% | 48% | HVAC humidity control functioning properly |
| Ambient Pressure | Record value | 1013.2 hPa | For documentation, no specific target |
| External Vibration | Minimal | <0.1g | Measured using accelerometer at balance location |
| Ambient Light | 500-750 lux | 620 lux | Measured at work surface level |
Dr. Miyako Tanaka, a metrology specialist I consulted with on several projects, emphasizes that “establishing these environmental baselines isn’t just about documentation—it provides the foundation for troubleshooting calibration issues later and determines the maximum achievable accuracy for your weighing operations.”
Once baseline measurements are established and within acceptable ranges, they should be monitored throughout the calibration process. Modern sampling booths with integrated monitoring systems simplify this process, but standalone monitoring equipment can be equally effective when properly deployed.
Remember that certain environmental parameters influence others—temperature affects relative humidity, for instance—so consider these relationships when evaluating your baseline conditions.
Step 2: Airflow and Pressure Differential Calibration
Proper airflow patterns and pressure relationships form the core functionality of any weighing booth. This step focuses on ensuring laminar airflow at the correct velocity while maintaining appropriate pressure differentials relative to surrounding areas.
Laminar airflow—characterized by smooth, parallel air streams—prevents turbulence that could disturb lightweight materials during weighing. The standard for most weighing booths is vertical laminar flow with air descending from ceiling-mounted HEPA filters toward the work surface at a uniform velocity.
To calibrate airflow:
- Position the anemometer at multiple points across the work area, creating a measurement grid with readings approximately 15cm apart.
- Measure velocity at each point, recording values in a consistent format.
- Calculate the average velocity and verify it falls within manufacturer specifications (typically 0.36-0.54 m/s or 70-100 fpm).
- Check for uniformity by ensuring no individual measurement deviates more than ±20% from the average.
When I conducted this process for a generics manufacturer, we discovered significantly higher velocities near the sides of the workspace. This uneven airflow was dispersing fine powder ingredients, affecting both measurement accuracy and operator exposure. The issue stemmed from partially blocked HEPA filters requiring replacement.
Pressure differential calibration is equally critical, particularly for applications handling hazardous materials. The booth must maintain appropriate pressure relationships with adjacent areas to control contamination:
| Booth Type | Pressure Relationship | Typical Differential | Purpose |
|---|---|---|---|
| Standard weighing booth | Positive to room | +0.03″ to +0.05″ WC | Prevents ingress of particles |
| Potent compound booth | Negative to room | -0.05″ to -0.1″ WC | Contains harmful materials |
| Hybrid systems | Varies by zone | See manufacturer specs | Application-specific containment |
To calibrate pressure differentials:
- With the booth operating at standard settings, place pressure measurement probes at specified locations (typically between the booth and adjacent areas).
- Verify readings against the design specifications.
- Adjust dampers or fan speeds as needed to achieve target differentials.
- Document final settings and readings.
Andrew Pearson, an equipment validation specialist I worked with on several pharmaceutical projects, notes: “Pressure differential calibration often requires a balancing act, especially in facilities with multiple controlled environments. A change to one system can cascade through others, so a systematic approach is essential.”
One challenge frequently encountered in this step involves interactions with the building’s overall HVAC system. Changes in building pressure or adjacent room classifications can affect the booth’s pressure relationships. In some cases, installing dedicated pressure monitoring systems with alarms provides an additional safety measure for critical applications.
For weighing booths handling potent compounds, smoke tests can provide visual verification of containment in addition to pressure measurements. These tests use neutrally buoyant smoke to visualize airflow patterns and confirm containment at the face opening.
Step 3: HEPA Filter Integrity Testing
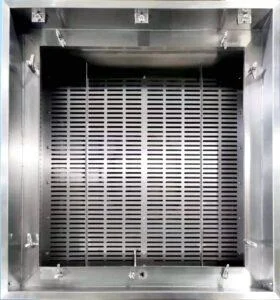
The High-Efficiency Particulate Air (HEPA) filtration system represents the primary contamination control mechanism in a weighing booth. Ensuring filter integrity is crucial for maintaining the specified cleanliness classification. This step verifies both the physical integrity of the filter media and its proper sealing within the housing.
The gold standard for HEPA integrity testing is the DOP (Di-Octyl Phthalate) or PAO (Poly-Alpha Olefin) aerosol test. These tests generate a challenge aerosol of precise particle size (typically 0.3μm) upstream of the filter, then measure any penetration using a photometer downstream. Here’s the typical procedure:
- Generate the test aerosol upstream of the filter at a concentration producing approximately 100% on the photometer scale.
- Scan the entire downstream face of the filter, filter seals, and frame at a consistent speed (approximately 5 cm/second).
- Monitor the photometer for any readings above the acceptance threshold (typically 0.01% of upstream concentration).
- Document any leaks identified, including specific locations and measured penetration percentages.
During a validation project for an API manufacturing facility, our initial testing revealed multiple leaks exceeding 0.05% penetration—well above acceptable limits. Closer inspection showed damage to the filter media during installation, likely from contact with sharp edges in the housing. This underscores the importance of careful handling during filter replacement.
For weighing booths with Ultra-Low Penetration Air (ULPA) filtration, which is increasingly common for nanomaterial handling, the testing process remains similar but with stricter acceptance criteria, typically 0.001-0.005% penetration.
A complementary approach involves particle counting to verify the cleanliness classification achieved:
| ISO Class | Maximum Particles ≥0.5μm per m³ | Typical Application |
|---|---|---|
| ISO 5 | 3,520 | Sterile pharmaceutical weighing |
| ISO 6 | 35,200 | Standard pharmaceutical weighing |
| ISO 7 | 352,000 | Chemical laboratory weighing |
| ISO 8 | 3,520,000 | Basic powder handling |
“What many end-users don’t realize,” explains Dr. Rachel Liu, a contamination control specialist I’ve collaborated with, “is that filter performance depends not just on integrity but also on appropriate airflow. A perfectly intact filter operated outside its designed flow range won’t deliver expected performance.”
After completing integrity testing, verify that airflow velocity remains within specifications, as adjustments made during filter testing could affect previously calibrated settings. Additionally, check that differential pressure across the filter falls within the manufacturer’s specified range—too low might indicate bypassing, while too high could signal loading or obstruction.
For facilities with hybrid dispensing and weighing booths with advanced filtration systems, additional testing may be required for exhaust HEPA filters or special containment features. Always consult the manufacturer’s recommendations for these specialized systems.
Step 4: Balance Calibration and Performance Verification
While the weighing booth provides the controlled environment, the analytical balance is the actual measuring instrument. This step focuses on calibrating the balance within the context of its operating environment—the now-calibrated weighing booth.
Begin by ensuring the balance is properly positioned within the booth. The optimal location is typically centered in the workspace, away from direct airflow impingement and on a stable, vibration-free surface. For highly sensitive microbalances, dedicated anti-vibration tables may be necessary.
Before formal calibration, allow the balance to equilibrate within the booth environment for at least 2-4 hours after power-up. This minimizes drift related to electronic warm-up and thermal stabilization. During this period, you can prepare the calibration weights and documentation.
The formal calibration process typically includes:
- Leveling verification: Ensure the balance is perfectly level using its adjustable feet and built-in level indicator.
- Zero setting: Reset the balance to zero and verify stability.
- Linearity testing: Using calibration weights spanning the intended range (typically 3-5 points across the range), verify the balance response is linear.
- Repeatability testing: Perform multiple measurements (at least 10) with the same weight to assess variation.
- Eccentricity testing: Place a test weight in different positions on the weighing pan to verify consistent readings regardless of position.
Document these results in a calibration report, including:
| Test | Acceptance Criteria | Results | Pass/Fail |
|---|---|---|---|
| Leveling | Bubble centered in indicator | Centered | Pass |
| Zero stability | ±1 display digit over 5 minutes | 0.0001g variation | Pass |
| Linearity | ±0.1% of applied weight | Max deviation 0.08% | Pass |
| Repeatability | RSD <0.1% | 0.042% RSD | Pass |
| Eccentricity | Max deviation <0.1% | 0.05% max deviation | Pass |
One particularly challenging calibration I performed involved a microbalance in a nuclear research facility where radioactive material would be weighed. The sensitivity of the instrument (0.001mg readability) meant that even minute air currents from the laminar flow affected readings. The solution involved creating a partial shield around the balance that maintained contamination control while reducing direct airflow impact—a delicate balance between weighing accuracy and containment requirements.
James Westwick, a pharmaceutical metrologist I’ve consulted with, emphasizes that “balance calibration must be performed under actual operating conditions, not idealized environments. The interaction between the instrument and its environment is as important as the instrument’s intrinsic capabilities.”
For regulated industries, evaluate whether the balance calibration meets your specific requirements:
- USP <41> for pharmaceutical applications
- ASTM E617 weight specifications
- OIML R111 international standards
- 21 CFR Part 11 compliance for electronic records
Remember to document any environmental parameters during calibration, as these establish the validated operating range for the balance. Deviations from these conditions in routine operation may require recalibration or adjustment of results.
Step 5: Particle Count Verification
Regardless of how well a weighing booth’s components appear to function individually, the ultimate test of its performance is the actual cleanliness level achieved. Particle count verification provides empirical evidence that the booth operates to its specified cleanliness classification.
This step involves systematic measurement of airborne particle concentrations within the weighing area using a calibrated particle counter. The process should comply with ISO 14644-1 standards for cleanroom classification, adapted to the context of a weighing booth:
- Determine the minimum number of sampling locations based on the workspace area (typically ≥3 points for most booths).
- Position the particle counter isokinetically, with the sampling probe facing the airflow direction.
- Collect samples of sufficient volume to ensure statistical validity (typically minimum 2 liters per location).
- Calculate results in particles per cubic meter for relevant particle sizes (typically both 0.5μm and 5.0μm).
- Compare results against the specified ISO classification limits.
During a recent particle verification for a cosmetics manufacturer’s powder weighing station, we found particle counts significantly higher than expected for an ISO 7 environment. Troubleshooting revealed that the booth was installed near a high-traffic corridor, with door movements creating pressure fluctuations that compromised the booth’s containment. Simply relocating the booth resolved the issue—demonstrating how facility layout can impact calibration results.
The testing should include measurement under both “at-rest” and “operational” conditions:
| Condition | Description | Purpose | Typical Acceptance Criteria |
|---|---|---|---|
| At-rest | Booth running, no activity | Verifies basic system performance | Must meet specified ISO class |
| Operational | During simulated working conditions | Confirms real-world performance | May allow 1 ISO class relaxation |
| Recovery | After intentional particle generation | Measures system recovery time | Return to at-rest levels in specified time |
“Operational condition testing is where many booths fail to meet specifications,” notes Dr. Vanessa Chen, a contamination control expert who specializes in pharmaceutical applications. “The movement of materials and personnel introduces particles that challenge the system’s capabilities. Without operational testing, you have an incomplete picture of performance.”
For applications involving highly potent or toxic compounds, consider supplementing particle counting with surrogate powder tests using non-toxic materials with similar physical characteristics to actual process materials. These tests can verify containment effectiveness under realistic operational conditions.
Document all particle count results with specific details on sampling locations, test conditions, and instrument calibration information. This documentation is often required for regulatory compliance and provides a baseline for future performance comparison.
It’s worth noting that particle count verification should be completed after all other calibration steps, as it represents the integrated performance of the entire system rather than individual components.
Step 6: Comprehensive Systems Integration Check
With individual components calibrated, this step verifies that all systems work together harmoniously. Many weighing booths incorporate multiple subsystems (airflow, filtration, lighting, monitoring, alarms) that must function as an integrated unit.
Begin with a functional verification of control systems and interfaces:
- Verify that control panels accurately display system parameters
- Test the response to setpoint adjustments
- Confirm that monitored values match independent measurements
- Ensure data logging systems capture parameters correctly
For booths with automated features, verify each control sequence:
- Startup sequence: Confirm proper initialization of all systems in correct order
- Normal operation: Verify stable performance at designed setpoints
- Alarm conditions: Artificially trigger alarm conditions to verify appropriate response
- Power failure recovery: Test system behavior during power interruption and recovery
- Shutdown sequence: Ensure proper system shutdown without creating hazardous conditions
During a commissioning project for a potent compound handling facility, I encountered a critical integration issue: the booth’s containment alarm would activate appropriately when negative pressure was lost, but the building management system wasn’t receiving this signal. This communication gap meant that facility personnel wouldn’t be notified of containment failures. The issue was traced to incompatible signal protocols between systems—a reminder that integration testing must extend beyond the booth itself to facility interfaces.
For weighing booths with multiple operating modes (such as those that can switch between positive and negative pressure for different applications), verify each mode independently and test mode transition procedures.
Documentation for this step should include:
| System Function | Test Method | Expected Result | Actual Result | Pass/Fail |
|---|---|---|---|---|
| Low airflow alarm | Restrict intake | Alarm at <80% nominal flow | Alarm triggered at 78% | Pass |
| Pressure differential display | Compare to calibrated gauge | Within ±5% of reference | +2.3% deviation | Pass |
| Data logging | 24-hour operation | Complete parameter recording | Missing temperature data | Fail – Requires correction |
| UV sanitization cycle | Timed operation | 15-minute cycle, proper lockout | 15:05 runtime | Pass |
| Emergency purge | Activation test | Increased flow, audible alert | As expected | Pass |
For facilities subject to regulatory oversight, this integration check should include verification that the system operates within its validated parameters and that any deviations trigger appropriate responses. This is particularly important for weighing booths handling potent or hazardous compounds, where containment failures could have serious consequences.
“System integration testing often reveals interaction effects that component-level testing cannot detect,” explains Mark Henderson, an automation specialist I collaborated with on several pharmaceutical projects. “Something as simple as a control system scan rate being too slow can create cascading issues under certain conditions, despite all individual components functioning correctly.”
Remember to verify any safety interlocks or emergency features as part of this integration check. These might include emergency stops, power failure protocols, or containment backup systems.
Step 7: Documentation and Certification
The calibration process culminates in comprehensive documentation that serves multiple purposes: regulatory compliance, baseline establishment for future comparisons, and operational reference. While sometimes viewed as merely administrative, this step provides the evidence that your weighing booth meets its specified requirements.
A complete calibration documentation package typically includes:
Calibration certificate: Formal document stating the booth has been calibrated to specified standards, including test dates, calibration due date, and authorized signatures.
Detailed test reports: Individual results for each calibration step, including raw data, calculations, and pass/fail determinations.
Deviation reports: Documentation of any parameters that failed to meet specifications, including risk assessments and corrective actions.
Instrument traceability: Calibration certificates for all test instruments used, establishing an unbroken chain to national standards.
As-found/as-left conditions: Comparison of booth performance before and after any adjustments made during calibration.
For regulated industries, additional documentation requirements may apply:
| Regulatory Framework | Documentation Requirements | Verification Needed |
|---|---|---|
| EU GMP Annex 1 | Documented contamination control strategy | Classification verification and monitoring plan |
| FDA cGMP | Process validation evidence | Performance qualification under actual conditions |
| USP <800> | Containment verification | NIOSH-compliant handling of hazardous drugs |
| ISO 14644 | Formal classification report | Statistical analysis of particle count data |
When I led validation for a contract manufacturing organization’s new weighing facility, we encountered resistance to the detailed documentation requirements. The operations manager questioned, “Why do we need all this paperwork when the equipment works fine?” Six months later, when a product contamination investigation required historical performance data, the value became clear—we could demonstrate continuous compliance and eliminate the booth as a potential contamination source.
Establish a calibration schedule as part of this documentation, typically:
- Complete recalibration: Annually
- Airflow verification: Quarterly
- Filter differential pressure: Monthly
- Particle counts: Semi-annually
- Balance calibration: According to usage frequency and risk assessment
Senior quality specialist Jennifer Morris, whom I’ve worked with on compliance projects, emphasizes that “documentation isn’t just about checking regulatory boxes—it’s about creating institutional knowledge. When properly structured, calibration records tell the performance history of equipment and guide maintenance decisions.”
For multi-site organizations, consider standardizing documentation formats across facilities to facilitate comparison and compliance assessments. Electronic systems with appropriate controls can streamline this process while meeting 21 CFR Part 11 requirements for electronic records.
Remember to store calibration records according to your organization’s retention policy, typically a minimum of two years or the life of the product for GMP applications. Secure backup copies should be maintained in case primary records are damaged or lost.
Maintaining Calibration: Ongoing Monitoring and Troubleshooting
Calibration is not a one-time achievement but an ongoing state that must be maintained through regular monitoring and proactive intervention. This final section addresses how to preserve the calibrated state of your weighing booth between formal recalibrations.
Implement a monitoring program with appropriate frequency based on risk assessment:
- Daily checks: Simple visual inspections and basic function verification
- Pressure differential gauges reading within range
- Airflow indicators showing proper operation
- No visible damage to HEPA filters or seals
- Balance zero stability verification
- Weekly verification: More detailed operational checks
- Documented pressure readings compared against acceptance range
- Airflow spot checks at critical positions
- Balance performance verification with check weights
- Inspection of seals and gaskets
- Monthly assessment: Trend analysis and preventive actions
- Review of daily/weekly data for developing trends
- Filter pressure differential trending to identify loading
- Verification of alarm systems and response procedures
- Minor maintenance activities (surface cleaning, seal inspection)
Establish alert and action limits for critical parameters. Alert limits signal potential drift before specifications are exceeded, allowing proactive intervention:
| Parameter | Specification | Alert Limit | Action Limit | Response to Excursion |
|---|---|---|---|---|
| Airflow velocity | 0.45 ±0.09 m/s | ±0.07 m/s | ±0.09 m/s | Recalibrate air handling system |
| Booth pressure | +0.05″ WC | +0.04″ WC | +0.03″ WC | Inspect seals, verify fan operation |
| Particle counts | ISO 7 (<352,000 particles/m³) | 300,000/m³ | 352,000/m³ | Check filters, identify particle sources |
| Balance accuracy | ±0.1% | ±0.08% | ±0.1% | Recalibrate balance |
During a troubleshooting session at a pharmaceutical client’s facility, we identified an unusual cyclic pattern in their booth pressure readings. The investigation revealed that an adjacent HVAC system was cycling on a 30-minute interval, causing building pressure fluctuations that affected the booth. Without trend monitoring, this pattern would have gone undetected despite affecting weighing accuracy.
One often overlooked aspect of maintaining calibration is operator training. Ensure all users understand:
- The critical parameters of the booth and their acceptable ranges
- How their actions can affect booth performance
- Proper procedures for material transfer in/out of the booth
- Response protocols for alarms or out-of-specification conditions
“The best monitoring system is only as good as the response it generates,” notes operational excellence director Robert Chen, whose contamination control program I helped implement. “Detected deviations must trigger appropriate actions—documentation alone doesn’t maintain calibration.”
For critical applications, consider implementing continuous monitoring systems that provide real-time data on booth performance. These systems can detect transient events that periodic checks might miss and provide historical data for trend analysis.
Lastly, establish a formal change control process for any modifications to the booth or its surroundings. Something as seemingly minor as relocating equipment near the booth or changing a room’s utilization pattern can affect airflow patterns and pressure relationships, potentially compromising calibration.
By implementing these ongoing monitoring practices, you can maintain your weighing booth’s calibrated state, extend intervals between full recalibrations, and ensure consistent performance for your critical weighing operations.
Frequently Asked Questions of How to Calibrate Weighing Booth
Q: What is the purpose of calibrating a weighing booth?
A: Calibrating a weighing booth is essential to ensure that it provides accurate weight measurements. Over time, weighing booths can experience drift due to usage or environmental factors, which can lead to inaccurate readings. Regular calibration helps maintain compliance with legal standards and ensures that the booth operates efficiently.
Q: What equipment do I need to calibrate a weighing booth?
A: To calibrate a weighing booth, you typically need specialized calibration weights that match the booth’s capacity. These weights are designed to ensure precise measurements. Additionally, a stable and flat surface is crucial for accurate calibration.
Q: How often should I calibrate my weighing booth?
A: The frequency of calibration depends on usage and regulatory requirements. Generally, it is recommended to calibrate a weighing booth regularly, especially if it is used frequently or in environments where accuracy is critical.
Q: What are the basic steps in calibrating a weighing booth?
A: The basic steps include:
- Placing the booth on a stable surface.
- Connecting any necessary indicators or devices.
- Using calibration weights to set reference points.
- Confirming the calibration through the device’s interface.
Q: Can I use internal calibration if my weighing booth has this feature?
A: Yes, if your weighing booth has an internal calibration feature, you can use it. However, external calibration weights may still be necessary for verification or if the internal system requires adjustment.
Q: What are common challenges faced during the calibration process?
A: Common challenges include ensuring the booth is on a level surface, selecting appropriate calibration weights, and navigating the device’s interface to access calibration modes. Additionally, maintaining a clean environment can help prevent errors during calibration.
External Resources
Everything You Should Know About Weighing Booths – This resource provides comprehensive information about weighing booths, including their importance in maintaining precision and preventing contamination. However, it does not specifically cover calibration.
Calibration Procedures for Weighing Scales in Warehouses – While not specifically about weighing booths, this guide offers detailed insights into the calibration of weighing scales, which are often used within weighing booths.
Dispensing Booth Qualification Protocol – This protocol discusses the qualification process for dispensing booths, which may share similar environmental control features with weighing booths, but does not directly address calibration.
Weighing Booths for Cleanroom Applications – This article focuses on the use of weighing booths in cleanroom environments, highlighting their precision and safety features, but does not specifically cover calibration procedures.
Cleanroom Booths: A Comprehensive Guide – This guide provides a broad overview of cleanroom booths, including weighing booths, but lacks specific calibration instructions.
Introduction to Weighing Booths – Offers an introduction to the role and features of weighing booths, emphasizing their importance in controlled environments, but does not cover calibration procedures directly.
Related Contents:
- Weighing Booth vs Scale Room: Which is Right for You?
- Precision Weighing Booths for Pharmaceutical Industry
- What is a Weighing Booth? Essential Facts Explained
- The Ultimate Guide to Weighing Booths [2025 Edition]
- HEPA Filter Testing: Ensuring Optimal Performance
- VHP Sensor Calibration: GMP Compliance Procedures
- Laminar Air Flow Unit Calibration Guide 2025
- Calibrating Sterility Test Isolator Monitoring Systems
- VHP Chamber Calibration: Essential Techniques


