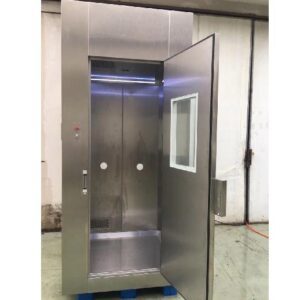
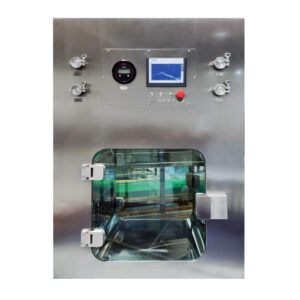
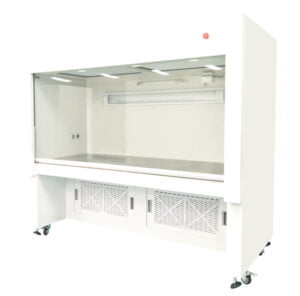
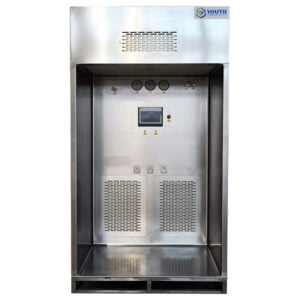
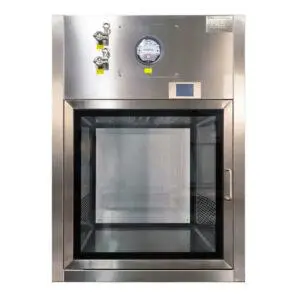
Laminar air flow units have become an essential component in various industries, from healthcare to manufacturing, where maintaining a clean and controlled environment is crucial. As we approach 2025, the demand for these units continues to grow, and many are turning to DIY installations to meet their needs. This comprehensive guide will walk you through the process of installing a laminar air flow unit, providing you with the knowledge and confidence to tackle this project yourself.
Installing a laminar air flow unit may seem daunting at first, but with the right guidance and attention to detail, it can be a manageable and rewarding project. This article will cover everything from the initial planning stages to the final testing and maintenance of your newly installed unit. We'll explore the key components, necessary tools, and step-by-step instructions to ensure a successful installation.
As we delve into the intricacies of laminar air flow unit installation, it's important to understand that this process requires careful consideration of various factors, including room layout, airflow patterns, and filtration requirements. By following the guidelines presented here, you'll be well-equipped to create a clean, controlled environment that meets your specific needs.
"Installing a laminar air flow unit is a critical process that requires precision and attention to detail. When done correctly, it can significantly improve air quality and create a controlled environment essential for many industries."
What are the key components of a laminar air flow unit?
Before diving into the installation process, it's crucial to familiarize yourself with the main components of a laminar air flow unit. Understanding these elements will help you make informed decisions during the installation and troubleshooting processes.
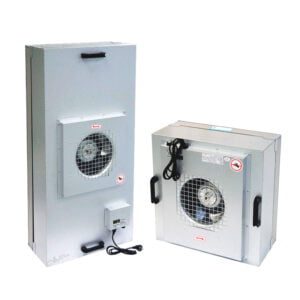
A typical laminar air flow unit consists of several key parts, including the fan, HEPA filters, pre-filters, and the housing or enclosure. Each component plays a vital role in creating the laminar flow of clean air that is characteristic of these units.
The heart of the system is the fan, which drives the air through the filtration system and into the work area. HEPA filters are responsible for removing particulates from the air, while pre-filters capture larger particles to extend the life of the HEPA filters. The housing or enclosure contains all these components and directs the airflow.
"The efficiency of a laminar air flow unit is directly related to the quality and proper installation of its components. Each element must work in harmony to create the desired clean air environment."
| Component | Function | Typical Lifespan |
|---|---|---|
| Fan | Drives air through the system | 5-10 years |
| HEPA Filter | Removes 99.97% of particles 0.3 microns or larger | 3-5 years |
| Pre-filter | Captures larger particles | 6-12 months |
| Housing | Contains and directs airflow | Lifetime of the unit |
In conclusion, understanding the key components of a laminar air flow unit is essential for a successful installation. Each part plays a crucial role in creating and maintaining a clean air environment, and proper selection and installation of these components will ensure optimal performance of your unit.
How do you prepare the installation site?
Proper site preparation is a critical first step in the installation process of a laminar air flow unit. This phase sets the foundation for a successful installation and ensures that your unit will function optimally in its intended environment.
Begin by thoroughly cleaning the area where the unit will be installed. This includes removing any dust, debris, or potential contaminants that could interfere with the unit's performance. Next, assess the room's layout and identify the best location for the unit, considering factors such as power supply, workflow, and existing ventilation systems.
It's also important to evaluate the structural integrity of the installation site. The laminar air flow unit will need a stable and level surface to operate correctly. If necessary, reinforce the floor or wall where the unit will be mounted to ensure it can support the weight and vibrations of the equipment.
"A well-prepared installation site is the foundation of a properly functioning laminar air flow unit. Taking the time to clean, assess, and prepare the area will pay dividends in the long-term performance and efficiency of your unit."
| Preparation Step | Purpose | Time Estimate |
|---|---|---|
| Cleaning | Remove contaminants | 2-4 hours |
| Site Assessment | Determine optimal location | 1-2 hours |
| Structural Evaluation | Ensure stability | 2-3 hours |
| Power Supply Check | Confirm electrical requirements | 1 hour |
In conclusion, thorough site preparation is essential for the successful installation of a laminar air flow unit. By taking the time to clean, assess, and prepare the area, you're setting the stage for a smooth installation process and optimal performance of your unit.
What tools and materials are required for installation?
Having the right tools and materials at hand is crucial for a smooth and efficient installation process of your laminar air flow unit. This section will guide you through the essential items you'll need to complete the installation successfully.
The tools required for installation typically include both common household items and some specialized equipment. You'll need basic tools such as screwdrivers, wrenches, and a level, as well as more specific items like a digital anemometer for airflow testing. As for materials, these will largely depend on the specific model of your laminar air flow unit and the installation site.
It's important to gather all necessary tools and materials before beginning the installation process. This will help avoid interruptions and ensure a more efficient workflow. Additionally, having the right tools will help prevent damage to the unit or the installation site.
"The success of your laminar air flow unit installation heavily depends on having the right tools and materials. Proper preparation in this regard can significantly reduce installation time and potential complications."
| Tool/Material | Purpose | Estimated Cost |
|---|---|---|
| Screwdriver Set | Assembly and mounting | $20-$50 |
| Wrench Set | Tightening connections | $30-$80 |
| Level | Ensure proper alignment | $10-$30 |
| Digital Anemometer | Airflow testing | $50-$200 |
| Sealant | Air-tight connections | $10-$30 |
In conclusion, having the right tools and materials is essential for a successful laminar air flow unit installation. By ensuring you have everything you need before starting, you'll be well-prepared to handle the installation process efficiently and effectively.
How do you assemble the main unit components?
Assembling the main components of your laminar air flow unit is a critical step in the installation process. This phase requires careful attention to detail and adherence to the manufacturer's instructions to ensure proper functioning of the unit.
Begin by unpacking all components and laying them out in a clean, organized manner. This will help you identify all parts and ensure nothing is missing. Next, start with the main housing or enclosure. This typically forms the backbone of the unit and will house the fan, filters, and other components.
As you assemble the unit, pay close attention to the sequence of installation. Generally, you'll install the fan first, followed by the pre-filters and HEPA filters. Ensure all connections are secure and properly sealed to prevent air leaks, which could compromise the unit's efficiency.
"Proper assembly of the main unit components is crucial for the overall performance of your laminar air flow unit. Each component must be installed correctly and in the right sequence to create the desired laminar flow of clean air."
| Component | Installation Order | Critical Considerations |
|---|---|---|
| Housing | 1 | Ensure it's level and stable |
| Fan | 2 | Check for proper orientation |
| Pre-filters | 3 | Secure fit to prevent bypass |
| HEPA filters | 4 | Handle with care to avoid damage |
In conclusion, assembling the main components of your laminar air flow unit requires careful attention to detail and adherence to the manufacturer's instructions. By following the correct sequence and ensuring proper connections, you'll set the foundation for a well-functioning unit.
How do you install and connect the filtration system?
The filtration system is the heart of your laminar air flow unit, responsible for purifying the air and creating the clean environment you need. Installing and connecting this system correctly is crucial for the unit's performance and efficiency.
Start by carefully inspecting each filter before installation. Look for any signs of damage or defects that could compromise their effectiveness. The pre-filters should be installed first, followed by the HEPA filters. Ensure each filter is seated properly in its housing and that there are no gaps that could allow unfiltered air to bypass the system.
When connecting the filtration system to the fan and housing, pay close attention to the airflow direction. Arrows on the filters and housing should align to indicate the correct flow path. Use appropriate gaskets or sealants to create airtight connections between components, preventing any leakage of unfiltered air.
"The effectiveness of your laminar air flow unit hinges on the proper installation and connection of its filtration system. A well-installed system ensures that all air passing through the unit is thoroughly cleaned, maintaining the integrity of your controlled environment."
| Filter Type | Installation Order | Replacement Frequency |
|---|---|---|
| Pre-filter | 1 | Every 3-6 months |
| HEPA filter | 2 | Every 1-2 years |
| Carbon filter (if applicable) | 3 | Every 6-12 months |
In conclusion, installing and connecting the filtration system is a critical step in setting up your laminar air flow unit. By ensuring proper installation, sealing, and alignment, you'll maximize the efficiency and effectiveness of your unit's air purification capabilities.
How do you set up and test the electrical components?
Setting up and testing the electrical components of your laminar air flow unit is a crucial step that ensures safe and efficient operation. This process involves connecting the fan and any control systems to a power source, as well as testing all electrical components for proper function.
Begin by reviewing the electrical requirements of your unit and ensuring that your power supply matches these specifications. Most laminar air flow units require a dedicated circuit to prevent overloading. If you're not comfortable with electrical work, it's advisable to consult a licensed electrician for this step.
Once the connections are made, it's time to test the system. Turn on the unit and check that the fan operates smoothly and quietly. If your unit has speed controls or other features, test each of these to ensure they're functioning correctly. Use a multimeter to verify that voltage and current readings are within the specified range.
"Proper setup and testing of electrical components is not just about ensuring functionality – it's a critical safety measure. Incorrect electrical connections can pose serious risks and compromise the performance of your laminar air flow unit."
| Component | Test Method | Expected Result |
|---|---|---|
| Fan | Visual and auditory check | Smooth, quiet operation |
| Speed Control | Adjust settings | Fan responds accordingly |
| Power Supply | Multimeter reading | Matches unit specifications |
| Control Panel | Function test | All buttons/displays work |
In conclusion, setting up and testing the electrical components of your laminar air flow unit is a critical step that ensures both safety and functionality. By carefully following manufacturer instructions and conducting thorough tests, you can ensure that your unit is ready for reliable operation.
How do you calibrate and verify the airflow?
Calibrating and verifying the airflow is a crucial final step in the installation process of your laminar air flow unit. This ensures that the unit is operating at its intended efficiency and providing the clean, controlled environment you need.
Start by allowing the unit to run for at least 15-30 minutes to stabilize the airflow. Using a calibrated anemometer, measure the air velocity at multiple points across the face of the unit. The readings should be consistent and fall within the manufacturer's specified range, typically between 0.3 and 0.5 meters per second for most applications.
If the airflow is not within the specified range, you may need to adjust the fan speed or check for any obstructions in the system. Some units have built-in airflow adjustment mechanisms, while others may require manual fan speed adjustment.
"Proper calibration and verification of airflow is essential for the effectiveness of your laminar air flow unit. It ensures that the unit is creating the intended clean air environment and operating at peak efficiency."
| Measurement Point | Expected Velocity (m/s) | Acceptable Range |
|---|---|---|
| Center | 0.45 | 0.40 – 0.50 |
| Corners | 0.40 | 0.35 – 0.45 |
| Edges | 0.42 | 0.37 – 0.47 |
In conclusion, calibrating and verifying the airflow of your laminar air flow unit is a critical final step in the installation process. By ensuring that the airflow meets the manufacturer's specifications, you can be confident that your unit is ready to provide the clean, controlled environment you need.
What maintenance procedures should be followed post-installation?
After successfully installing your laminar air flow unit, implementing a regular maintenance routine is crucial to ensure its continued efficiency and longevity. Proper maintenance not only extends the life of your unit but also ensures it continues to provide the clean, controlled environment you require.
Start by establishing a cleaning schedule. The exterior of the unit should be wiped down regularly with appropriate cleaning agents to prevent the buildup of dust and contaminants. The work surface inside the unit should be cleaned before and after each use to maintain a sterile environment.
Filter replacement is another critical aspect of maintenance. Pre-filters typically need to be replaced more frequently than HEPA filters. Monitor the pressure differential across the filters, as an increase often indicates that replacement is necessary. Always follow the manufacturer's guidelines for filter replacement intervals.
"Regular maintenance is not just about keeping your laminar air flow unit clean – it's about ensuring consistent performance and protecting your investment. A well-maintained unit will provide years of reliable service and maintain the integrity of your controlled environment."
| Maintenance Task | Frequency | Importance |
|---|---|---|
| Exterior Cleaning | Weekly | Prevents contaminant buildup |
| Work Surface Cleaning | Before/After Each Use | Maintains sterile environment |
| Pre-filter Check | Monthly | Ensures efficient filtration |
| HEPA Filter Check | Quarterly | Maintains air quality |
| Full System Inspection | Annually | Identifies potential issues |
In conclusion, implementing a thorough maintenance routine is essential for the longevity and effectiveness of your laminar air flow unit. By following these procedures, you can ensure that your unit continues to provide a clean, controlled environment for years to come.
As we conclude this comprehensive guide on installing a laminar air flow unit, it's clear that while the process may be complex, it's certainly achievable with the right knowledge and preparation. From understanding the key components to calibrating the airflow, each step plays a crucial role in creating a functional and efficient clean air environment.
Remember, the installation process doesn't end with the final assembly. Regular maintenance and monitoring are essential to ensure your laminar air flow unit continues to perform optimally. By following the guidelines outlined in this article, you'll be well-equipped to install and maintain a laminar air flow unit that meets your specific needs.
As clean air requirements continue to evolve, YOUTH remains at the forefront of filtration technology, offering innovative solutions for various industries. Whether you're looking to install a new unit or upgrade an existing one, consider exploring the range of DIY laminar flow unit installation steps available to ensure you're getting the most advanced and efficient solution for your needs.
With careful planning, attention to detail, and ongoing maintenance, your laminar air flow unit will provide a reliable, clean environment for years to come, supporting your work and ensuring the highest standards of air quality control.
External Resources
DIY LAMINAR FLOW HOOD PLANS – This document provides a detailed, step-by-step guide on how to build a DIY laminar flow hood, including materials, tools, and assembly instructions. It covers constructing the filter housing, installing the fan, wiring, and sealing the box.
Assembling the Horizontal Laminar Flow Hood – Ossila – This guide outlines the assembly process for a commercial horizontal laminar flow hood, including steps for assembling the filter panel, frame, attaching the filter panel, and installing the HEPA filter. It also includes tips for starting and maintaining the hood.
Laminar Flow HEPA Filter Diffuser – RectorSeal – Although focused on a specific product, this document provides installation instructions for a laminar flow HEPA diffuser, including steps for inspecting the unit, wiping down, and mounting it in a T-bar lay-in ceiling.
Instructables: DIY Laminar Flow Hood – This Instructables guide walks through the process of building a laminar flow hood using readily available materials. It includes steps on building the cabinet, installing the fan and filter, and ensuring proper airflow.
YouTube: DIY Flow Hood Part 1: Design – This video is part of a series that provides a detailed design and build process for a DIY laminar flow hood. It covers the initial design considerations and material selection.
Lab Manager: Setting Up a Laminar Flow Hood – This article provides general guidelines and best practices for setting up and maintaining a laminar flow hood in a laboratory setting. It includes tips on placement, cleaning, and ensuring optimal performance.
Related Contents:
- Laminar Flow Hood Airflow: Understanding Dynamics
- Laminar Air Flow Units for Contamination Control
- How to Clean Laminar Air Flow Units Safely
- Laminar Flow Hood Certification: Ensuring Quality
- Pharma Lab Laminar Air Flow Unit Applications
- Vertical Laminar Flow Hoods: Optimal Protection
- Horizontal Laminar Flow Hoods: Uses and Benefits
- Laminar Flow Hood vs BSC: Choosing Wisely
- Laminar Flow Hood Maintenance: Best Practices


