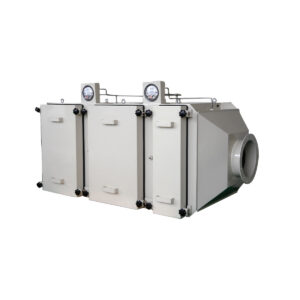
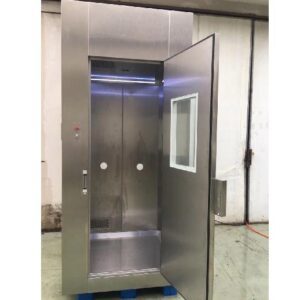
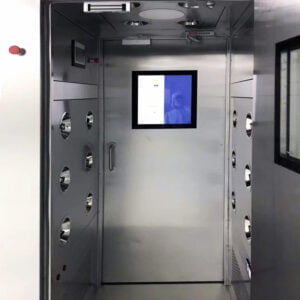
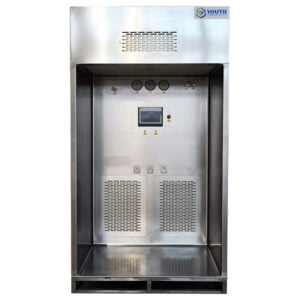
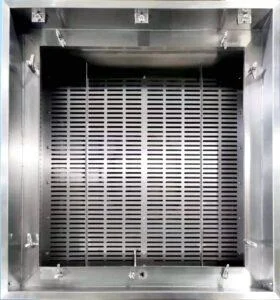
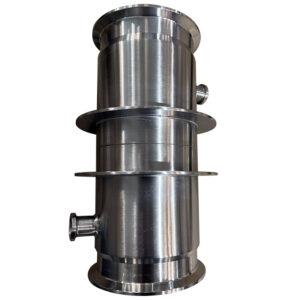
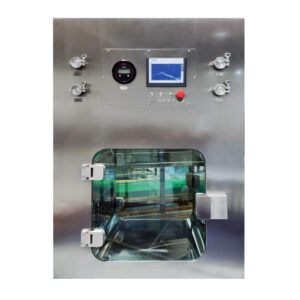
Understanding HEPA Housing Box Fundamentals
When I first encountered a HEPA terminal housing installation, I was struck by how such a seemingly simple box could so dramatically impact the cleanliness of an entire controlled environment. What makes these systems fascinating isn’t just their engineering design, but how their proper installation forms the foundation for everything from semiconductor manufacturing to pharmaceutical sterile processing.
HEPA housing boxes, also known as terminal diffusers or filter housings, serve as the critical final stage in controlled air delivery systems. These housings contain high-efficiency particulate air (HEPA) filters that remove 99.97% of particles 0.3 microns or larger—essential for maintaining cleanroom environments where even microscopic contaminants can compromise product integrity or research outcomes.
Properly installed HEPA box systems create laminar, unidirectional airflow that sweeps contaminants away from critical work areas. The installation process, while technical, follows a logical sequence that ensures integrity and performance. I’ve found that understanding the underlying principles before starting the physical installation makes all the difference in achieving optimal results.
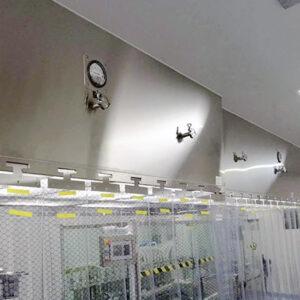
YOUTH Tech has developed terminal housing units that address many of the common challenges we face during installations. Their attention to design details—like the welded aluminum construction and the pressure gauge port—reflects a deep understanding of cleanroom requirements that goes beyond basic filtration.
Let’s examine the critical components and installation steps that ensure these systems deliver their promised performance.
HEPA Box Components and Selection Criteria
Before diving into installation procedures, we need to understand what we’re working with. A HEPA box installation isn’t simply hanging a filter in the ceiling—it’s an integrated system with multiple components that must work together seamlessly.
The main components include:
Housing structure – Typically constructed from anodized aluminum or stainless steel, the housing forms the protective shell and mounting framework. YOUTH’s housings use seam-welded aluminum that provides excellent strength-to-weight ratio while minimizing particle generation.
Filter sealing mechanism – This creates an airtight seal between the filter and housing to prevent bypass leakage. The gel seal design used in many modern HEPA terminal diffusers is particularly effective.
Filter media – The HEPA filter itself comes in various efficiency ratings. While H13 (99.95% efficient) is common for many applications, H14 (99.995%) might be required for more stringent environments.
Diffuser grille – Controls airflow pattern and velocity at the room-facing side. These can be perforated screens, adjustable louvers, or specialized designs for specific airflow patterns.
Connection ports – Includes duct connection collars, pressure differential ports, and sometimes sampling ports for testing.
The selection of appropriate components depends heavily on your specific application. During a cleanroom design project for a cell therapy lab last year, we had to carefully consider the appropriate housing size based on calculated air changes per hour (ACH) requirements—a critical factor that’s frequently overlooked. The housing needed to deliver 90 ACH, which influenced both the filter size and the number of housing units required.
| Component | Selection Factors | Common Specifications | Notes |
|---|---|---|---|
| Housing | Room class, available space, installation method | 2’×2′, 2’×4′, or custom sizes | Flush-mount designs are preferred for ISO 5-7 cleanrooms |
| HEPA Filter | Required efficiency, pressure drop constraints | H13 (99.95%), H14 (99.995%) | Mini-pleat designs offer lower pressure drop |
| Diffuser | Airflow pattern, velocity requirements | Perforated, louvered, radial | Perforated designs provide more uniform flow |
| Sealing | Application criticality, maintenance frequency | Gel seal, gasket, knife-edge | Gel seal generally provides better integrity |
One significant consideration is the balance between initial performance and long-term maintenance. During my consultation with a pharmaceutical client, we chose the terminal housing box with pressure gauge ports to facilitate ongoing monitoring—the initial installation was slightly more complex, but it dramatically simplified their routine certification process.
Pre-Installation Planning and Requirements
The success of any HEPA box installation begins long before the first tool is picked up. I learned this lesson the hard way during an early project where we rushed into installation without proper planning, only to discover structural ceiling limitations that forced a complete redesign.
Start by reviewing architectural and mechanical drawings to confirm:
- Ceiling structural integrity to support housing weight
- Available space above ceiling for housing and ductwork
- Accessibility for maintenance and filter changes
- Location of other ceiling-mounted services that might cause interference
The tools and materials you’ll need include:
- Lifting equipment appropriate for the housing weight
- Level and measuring tools
- Appropriate fasteners for the ceiling structure
- Sealing materials (silicone, gaskets, tape as specified)
- Clean gloves and appropriate cleanroom attire
- Documentation (installation manual, test protocols, drawings)
Safety should never be an afterthought. Working at height with relatively heavy components presents real risks. During a recent installation at a biosafety lab, our team identified a potential issue with the lifting plan. By pausing to reconsider our approach, we avoided what could have been a serious safety incident and potential damage to an expensive filter unit.
A critical step often overlooked is the validation of the HVAC system’s capability to handle the additional pressure drop introduced by the HEPA housing. Dr. Emily Rodriguez, whose research on airflow efficiency I’ve followed for years, emphasizes this point: “Many installation failures trace back to inadequate assessment of the overall system capability to overcome the resistance introduced by terminal HEPA filtration.”
Before starting, create a detailed installation checklist that includes:
- Verification of housing dimensions against available space
- Confirmation of filter specifications and sealing method
- Documentation of pre-installation tests on the housing unit
- Sequence of installation steps with sign-off points
- Required testing procedures after installation
This preparation is not just about avoiding problems—it’s about creating a smooth, efficient installation process that ensures the integrity of your clean environment.
The 7-Step HEPA Box Installation Process
The actual HEPA box installation follows a systematic approach that ensures structural integrity, air-tightness, and proper performance. Based on my experience installing dozens of these systems across various applications, I’ve refined the process into seven critical steps.
Step 1: Location Marking and Ceiling Preparation
Begin by precisely marking the installation locations on the ceiling grid based on the approved layout drawings. This isn’t just about aesthetics—proper spacing directly affects airflow patterns and cleanliness levels.
I always verify measurements from multiple reference points rather than relying on a single dimension. During a medical device manufacturing facility installation, this approach revealed a discrepancy in the drawings that would have created uneven airflow patterns across critical work surfaces.
For T-bar ceiling systems:
- Ensure the grid is reinforced to support the housing weight
- Install additional supports where needed
- Verify grid alignment and levelness
For hard ceilings:
- Mark and cut openings precisely to housing dimensions
- Install mounting brackets as specified by the manufacturer
- Verify structural support adequacy
Step 2: Housing Mounting and Securing
The housing must be securely mounted to prevent any movement that could compromise sealing or create particulate. This step often requires assistance, as housings are typically awkward to maneuver.
For suspended installations:
- Install threaded rods at specified locations
- Attach housing to rods using manufacturer-provided hardware
- Level the housing in both directions
- Secure with locking nuts or equivalent
For flush-mounted installations:
- Position housing in the opening
- Secure to ceiling structure per manufacturer specifications
- Verify flush alignment with ceiling surface
- Install any required trim or finishing elements
Michael Chen, a certification specialist I’ve collaborated with, emphasizes the importance of this step: “Poor mounting is the number one cause of leakage I encounter during certification testing. Taking time to ensure proper alignment and secure attachment pays dividends during validation.”
Step 3: Ductwork Connection and Sealing
Connecting the housing to the supply ductwork is critical for system integrity:
- Align ductwork with housing inlet collar
- Secure connection using appropriate fasteners
- Seal all joints with approved sealant or gasket material
- Verify connection integrity by visual inspection
The quality of this connection directly impacts system pressure balance. I’ve witnessed installations where poor ductwork connections created variable pressure drops across different housing units in the same cleanroom, resulting in inconsistent airflow patterns that were difficult to diagnose.
Step 4: HEPA Filter Installation
This is perhaps the most critical step, as it’s where the actual filtration element is introduced:
- Inspect the filter for any shipping damage or defects
- While wearing clean gloves, carefully remove protective packaging
- Position filter in housing according to airflow direction indicators
- Engage the filter locking mechanism according to design:
- For gel seal filters, ensure proper compression into the knife edge
- For gasket seal filters, verify even compression around the perimeter
- For fluid seal systems, check for continuous contact
During a pharmaceutical facility installation, I discovered a filter with minor shipping damage that wasn’t immediately obvious. Following my standard practice of thorough inspection before installation saved significant rework that would have been required had we discovered it during certification.
Step 5: Sealing Verification and Inspection
Once the filter is installed, thorough inspection of all sealing surfaces is essential:
- Visually inspect the filter-to-housing seal
- Check all external housing seams for integrity
- Verify ductwork connections are properly sealed
- Inspect any access panel gaskets or seals
The goal is to identify any potential leak points before the system is operational. In some critical applications, preliminary leak testing with a particle counter might be appropriate at this stage.
Step 6: Diffuser or Grille Attachment
The diffuser directs the filtered air into the cleanroom space:
- Align diffuser with housing attachment points
- Secure using specified hardware, typically designed for tool-less removal
- Verify diffuser is level and properly seated
- Confirm diffuser pattern matches design specifications
In one laboratory installation, we discovered that the specified diffuser pattern created undesirable turbulence near sensitive equipment. By recognizing this early and selecting an alternative diffuser design before final commissioning, we avoided disruption to the research activities.
Step 7: System Testing and Documentation
The final step involves verifying proper function and documenting the installation:
- Conduct initial airflow testing to verify expected volume
- Perform filter integrity testing (typically using DOP/PAO challenge)
- Measure pressure differential across the filter
- Document all test results and installation details
- Create a baseline for future performance comparison
This testing should conform to applicable standards such as ISO 14644-3 or IEST recommended practices. The documentation becomes part of the facility’s validation package and serves as a reference for future maintenance.
Common HEPA Box Installation Challenges
Every HEPA box installation presents unique challenges. Understanding the most common issues helps avoid costly mistakes and delays.
Structural Integration Issues
One of the most frequent challenges involves ceiling structure limitations. During a retrofit project in an older facility, we discovered the ceiling couldn’t support the weight of the specified housings without significant modification. We had to work with structural engineers to design additional support without disrupting adjacent utilities.
Some ceiling structures present unique challenges:
| Ceiling Type | Common Issues | Potential Solutions |
|---|---|---|
| T-Grid | Insufficient load capacity | Additional hanging rods, reinforced grid |
| Gypsum | Difficulty creating clean cutouts | Template usage, specialized cutting tools |
| Concrete | Anchor installation complexity | Core drilling, drop-in anchor systems |
| Pre-existing | Interference with utilities | Coordination with other trades, potential relocation |
The ASHRAE Handbook provides excellent guidance on structural considerations that I’ve frequently referenced when faced with unusual ceiling conditions.
Air Balance and Pressure Control
Achieving proper air balance across multiple HEPA housings can be challenging. During one pharmaceutical cleanroom installation, we discovered that the furthest units from the air handler received significantly less flow due to duct pressure losses. This required installing balancing dampers and recalibrating the entire system.
To address this challenge:
- Ensure the HVAC system has sufficient capacity
- Design ductwork with balanced pressure drops
- Include balancing dampers where needed
- Consider using housing units with integrated flow control
Leak Prevention and Testing Challenges
Leak prevention is critical yet challenging. The most common leak points include:
- Filter-to-housing seal interface
- Housing body seams
- Duct connections
- Access panel gaskets
The testing process itself can present challenges, particularly in identifying the exact source of leaks when detected. I’ve developed a systematic approach where we isolate different sections of the installation to pinpoint leak sources more efficiently.
My colleague who specializes in cleanroom certification shared a valuable insight: “Many installers focus exclusively on the filter-to-housing seal, but in my experience, ductwork connections are just as likely to be the source of contamination.” This matches my observations across numerous projects.
Maintenance Considerations for Long-Term Performance
The installation decisions you make directly impact long-term maintenance requirements and costs. Thinking ahead about maintenance access, filter replacement procedures, and performance monitoring can save substantial time and money over the system’s lifecycle.
Access and Filter Replacement Planning
During installation, consider how filters will eventually be replaced:
- Ensure adequate clearance above the housing for filter removal
- Verify that access panels or diffusers can be easily removed
- Position housings to minimize disruption during maintenance
- Consider room-side replaceable designs for critical areas
In a semiconductor cleanroom installation, we specifically selected room-side replaceable HEPA housing units to eliminate the need to access potentially contaminated above-ceiling spaces during filter changes. This added slightly to the initial installation complexity but dramatically simplified maintenance operations.
Performance Monitoring Systems
Installation should include provisions for ongoing monitoring:
- Differential pressure gauges or ports
- Airflow velocity measurement points
- Access for certification equipment
Modern systems increasingly incorporate continuous monitoring capabilities. During a recent installation for a cell therapy facility, we integrated pressure transducers connected to the building management system, allowing real-time alerting of filter loading or performance issues.
Documentation and Baseline Establishment
Comprehensive installation documentation serves as a crucial reference for future maintenance:
- Detailed as-built drawings showing exact housing locations
- Initial performance test results (pressure drop, airflow, leakage)
- Filter specifications and expected service life
- Photographic documentation of installation details
This baseline information allows maintenance teams to identify performance degradation accurately and plan interventions before critical failures occur.
Case Study: Pharmaceutical Cleanroom HEPA Box Installation
Last year, I led a project installing 24 HEPA housing units in a new pharmaceutical compounding facility. This real-world example illustrates many of the principles discussed above.
Project Requirements and Constraints
The project required:
- ISO 7 classification in operational state
- Room-side replaceable filters to minimize contamination risk
- Uniform airflow across critical work surfaces
- Integration with an existing HVAC system
- Minimal disruption to adjacent operational areas
The ceiling space was limited to 18 inches, creating significant challenges for housing selection and ductwork routing.
Installation Approach and Adaptations
We selected 2’×4′ HEPA housings with room-side replacement capability and gel seal filters. The installation sequence followed our standard 7 steps, but we encountered several challenges requiring adaptation:
Structural limitations – The ceiling structure required additional support points beyond standard recommendations. We worked with the structural engineer to design and install supplementary supports.
Airflow balancing – Initial testing revealed uneven airflow distribution. We installed balancing dampers and adjusted settings to achieve uniformity across all units.
Leak detection – During initial testing, three units showed minor leakage. By using a strategic isolation approach, we identified the exact leak points (two at duct connections, one at a housing seam) and corrected them before certification.
Results and Lessons Learned
The installation was successful, with the facility passing certification with no deficiencies. Key lessons from this project included:
Pre-installation mockups – Creating a full-scale mockup of one housing installation helped identify potential issues before full deployment.
Phased testing approach – Testing each housing immediately after installation, rather than waiting for complete system testing, allowed us to address issues incrementally.
Continuous monitoring integration – Adding differential pressure monitoring connected to the facility management system provided early warning of filter loading issues.
Documentation refinement – We developed improved installation checklists based on challenges encountered, which have been valuable in subsequent projects.
This project demonstrated the value of systematic planning and adaptation during HEPA box installation. The facility has now been operating for 18 months with no filtration issues or certification failures.
Future Trends and Conclusion
HEPA box installation continues to evolve with advancing technology and changing regulatory requirements. Several trends are worth noting:
Integrated monitoring systems are becoming standard, with real-time data on filter performance replacing periodic testing. This shift requires installers to understand not just mechanical aspects but also monitoring system integration.
Energy efficiency considerations have led to innovations in housing and filter design that reduce pressure drop. During recent installations, I’ve seen a 15-20% reduction in energy consumption through careful selection of low-pressure-drop designs without compromising filtration efficiency.
Modular design approaches are simplifying installation in complex environments. Pre-assembled units with standardized connections reduce field assembly requirements and potential error points.
When planning your next HEPA box installation, remember these key principles:
- Thoroughly understand your specific application requirements
- Select appropriate components for long-term performance
- Plan meticulously before physical installation
- Follow a systematic installation sequence
- Test comprehensively at each stage
- Document everything for future reference
The difference between a problematic installation and a successful one often comes down to attention to detail and systematic approach. By following the seven-step process outlined here and anticipating common challenges, you can ensure your HEPA box installation provides reliable performance for the life of your controlled environment.
The most successful projects I’ve been involved with share a common thread—they treat the installation not as a mechanical exercise but as an integrated system that balances technical requirements with practical considerations. This perspective transforms what could be a routine task into a critical foundation for clean environment performance.
Frequently Asked Questions of HEPA box installation
Q: What are the primary steps involved in HEPA box installation?
A: The primary steps in HEPA box installation include preparation of the site, measuring and marking the ceiling for the unit, opening a hole to fit the box, hoisting and securing the box, sealing the joints, connecting the ductwork, and installing the filter. Additionally, ensuring airtight connections and performing necessary tests are crucial for optimal performance.
Q: What are the key components of a HEPA housing box?
A: Key components of a HEPA housing box include the durable housing itself, the HEPA filter, pre-filters, gaskets for sealing, access doors for maintenance, and pressure ports for monitoring. These components ensure efficient filtration and easy maintenance.
Q: Why is proper sealing important during HEPA box installation?
A: Proper sealing during HEPA box installation is essential to prevent leaks and ensure that all air passes through the filter. This maintains the effectiveness of the HEPA filtration system and helps in maintaining clean air quality.
Q: How do you ensure safe lifting and securing of a HEPA housing box?
A: Safe lifting and securing involve using appropriate equipment, such as scissor lifts or ladders, with multiple people assisting if necessary. Ensure even distribution of weight and secure fastening to prevent accidents and ensure stability.
Q: What are the considerations for the location of the HEPA housing box during installation?
A: The location should be strategically chosen for optimal airflow and accessibility. Considerations include room layout, ductwork alignment, and ensuring that the box does not obstruct other fixtures.
Q: How do you test the performance of a newly installed HEPA housing box?
A: Testing involves verifying airflow rates, performing leak tests, and monitoring pressure drops. These tests ensure that the HEPA housing box operates effectively and maintains the desired air quality standards.
External Resources
Installation Instructions for Terminal HEPA FILTER BOX – This resource provides detailed steps for installing a terminal HEPA filter box, covering preparation, measurement, and sealing.
Hospital HVAC Systems: HEPA Housing Box Implementation Guide – Offers a comprehensive guide on installing HEPA housing boxes in hospital HVAC systems, focusing on strategic placement and system integration.
Installing Ceiling-Mounted HEPA Housing Boxes: 2025 Guide – Covers essential steps for ceiling-mounted HEPA housing box installations, including measurement, lifting, and connecting to ductwork.
Model HPL-GS HEPA Filter Installation – A video guide on installing a HEPA filter into an existing unit, highlighting safety and efficiency during the process.
HEPA Filter Housing Box Installation Considerations – This resource discusses important considerations for HEPA filter box installations, emphasizing safety and efficiency.
Fan Filter Units Installation, Operation & Maintenance – Provides installation instructions for fan filter units, including steps related to HEPA filters and ductwork connections.
Related Contents:
- Installing Ceiling-Mounted HEPA Housing Boxes: 2025 Guide
- Hospital HVAC Systems: HEPA Housing Box Implementation Guide
- Aerospace HEPA Housing Box Requirements & NASA Standards
- Ultimate Guide to HEPA Housing Boxes: Applications & Benefits
- Custom-Sized HEPA Housing Box Manufacturing Guidelines
- HEPA vs ULPA Housing Boxes: Choosing the Right Filtration
- HEPA Housing Boxes for Food Processing Air Quality Compliance
- Biotech Lab HEPA Housing Box Setup for Contamination Control
- BIBO HEPA Housing Box Installation for Hazardous Environments

